Set Up a Teaching Environment in UCloud
This guide explains how to create and manage a teaching environment in UCloud, including inviting co-teachers, creating shared drives, and organizing students into sub-projects.
Create a Teaching Project
Start by applying for a project dedicated to your course or teaching activities.
Follow the same procedure described in the: 👉 Expanded Application Guide
Important: When applying, make sure to select "AAU Education" and your faculty as the grant giver.
Once your project has been approved and resources have been allocated, you are ready to set up your teaching environment.
Create a Shared Drive for Teaching Materials
Shared drives are useful for distributing course materials, datasets, and other resources to students.
You can create additional drives for student groups and provide access to the relevant users.
Depending on your setup, you may be able to control which users have access to a specific drive.
To create a drive:
-
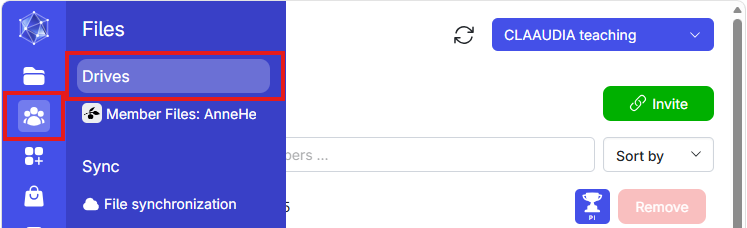
Select your teaching project and navigate to Files → Drives.
-
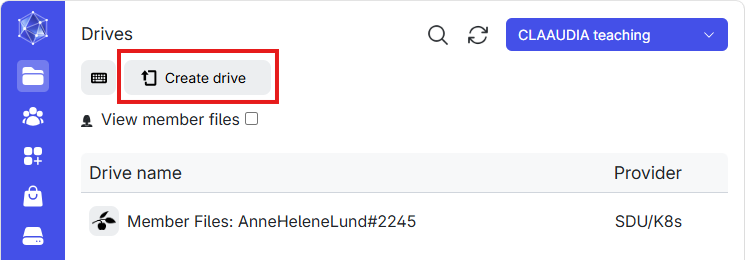
Select Create drive
-
Enter a name for the drive.
- Choose the storage backend:
- DeiC Interactive HPC (SDU/K8s)
-
Select the desired access level for all users:
- None – All users cannot access the drive.
- Read – All users can view and download files.
- Write – All users can upload and modify files.
Note: The acces level can be modified later on the properties page. All users means every user that is not project admins.
-
Click Create.
You can now create folders and upload files using the buttons available in the drive view.
Member Files
Every member of the project automatically receives a personal drive:
Member Files: Username#1234
This personal area contains a default folder called jobs, where:
- Submitted jobs are stored.
- Output files and logs generated by jobs are saved.
Possibilites within memberfiles:
- Create their own folders.
- Upload files.
- Organize their work independently.
The personal member files area is private and can only be accessed by the user and project administrators.
Add Co-Teachers or students to Your Project
If other instructors, teaching assistants or students need access to the project, you can add them as members.
-
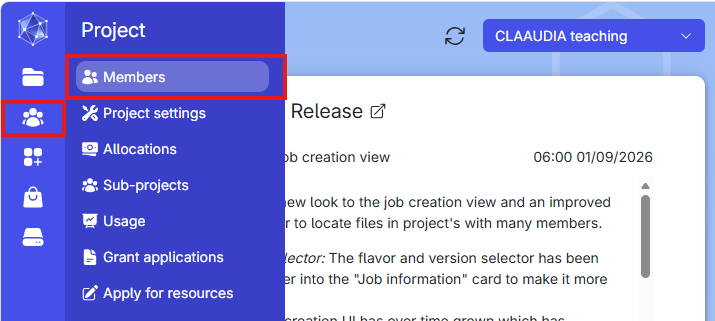
Select your project and navigate to Project → Members
-
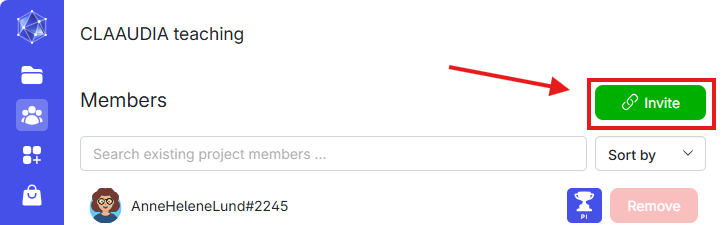
Invite users either:
- By entering their UCloud username, or
- By sharing an invitation link.
-
Open Link Settings and select the appropriate role:
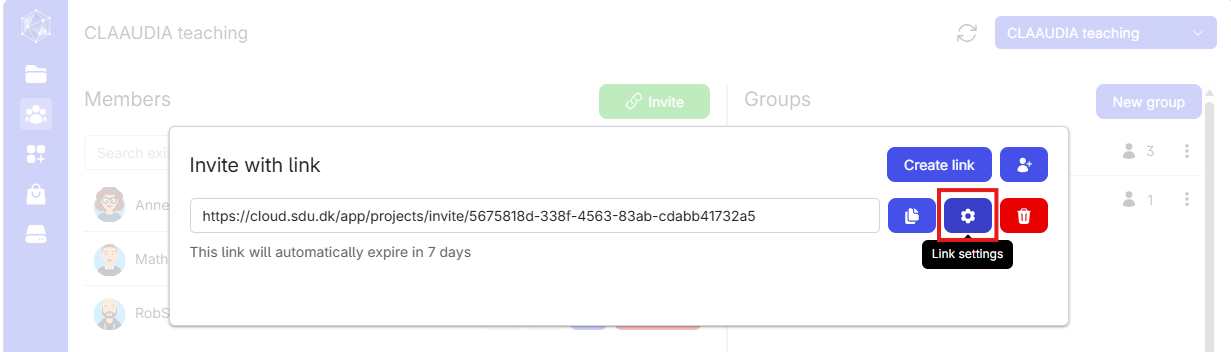
- Admin: Full project management permissions.
- User: Standard project access.
Only assign the Admin role to users who need to manage the project.
Managing group work through sub-projects
Sub-projects can be used to organize students into separate groups with their own resources and members. The process is similar to creating a regular project.
Create a Sub-Project
To create a sub-project:
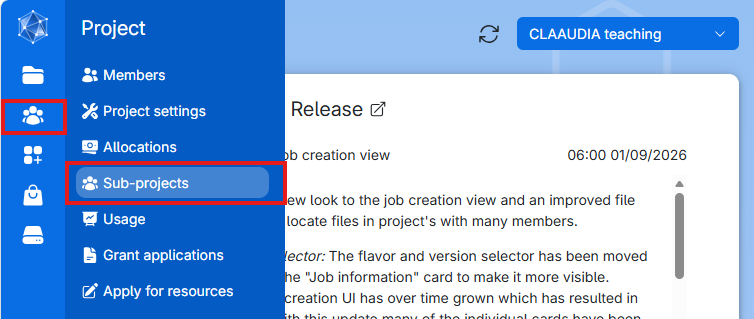
- Navigate to Project → Sub-projects.
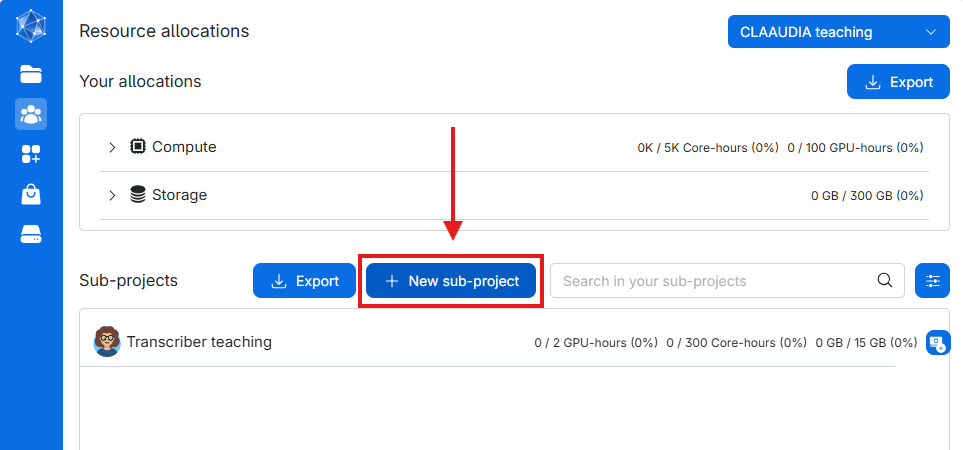
- Select New Sub-Project.
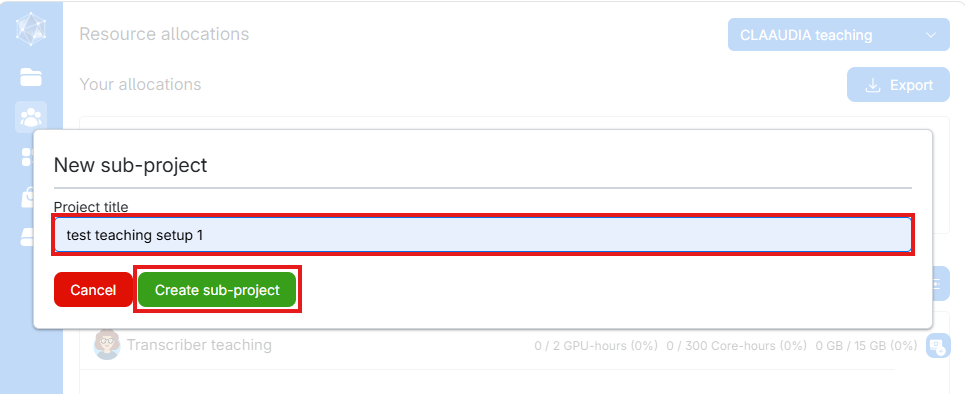
- Enter a project title an click Create sub-project.
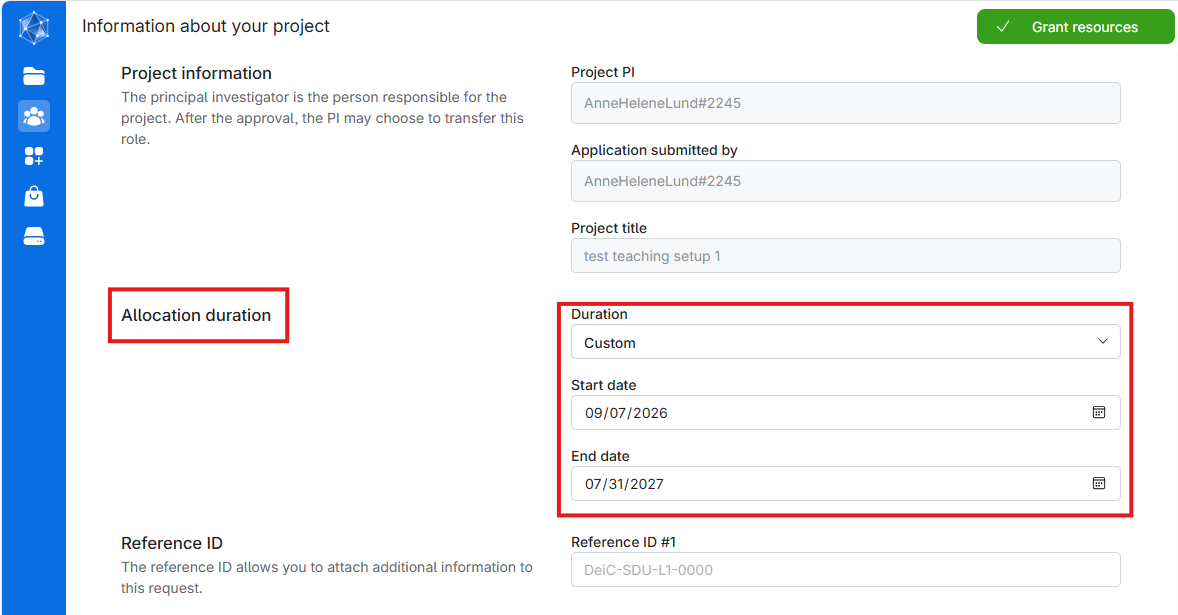
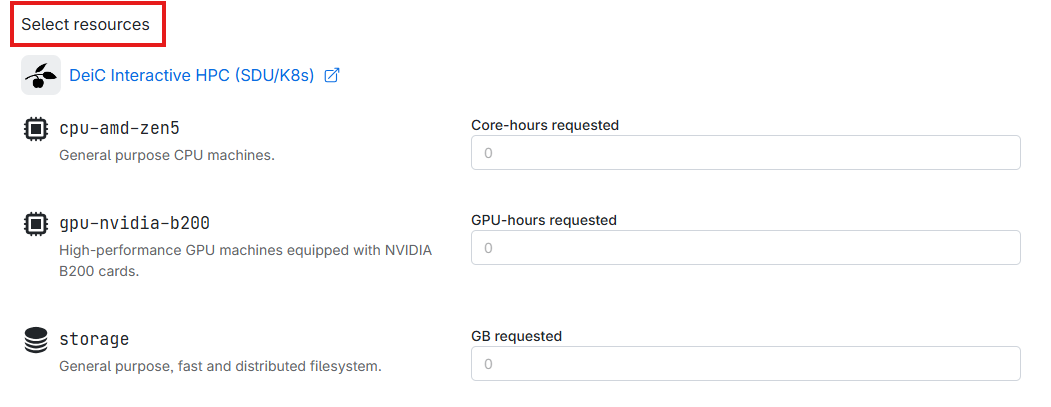
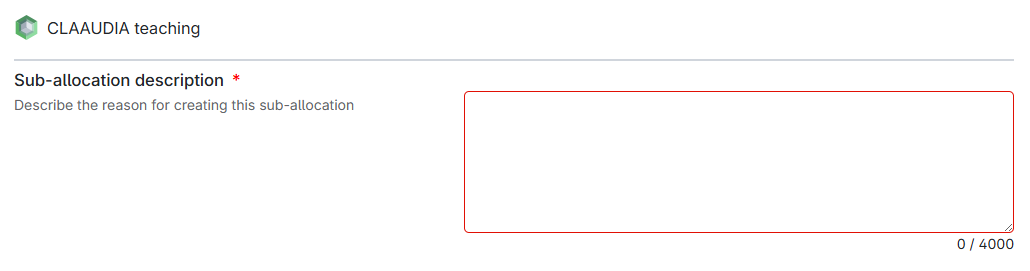
Next, configure the sub-project:
- Set the allocation duration.
- Select the required resources.
- Provide a short description of the purpose of the sub-project.
- Click Grant Resources.
Add Members to a Sub-Project
Inviting members or admins to a sub-project is similar to the proces of adding members to a project.
- Select the sub-project from the project selector in the upper-right corner.
- Navigate to Project → Members.
- Invite users:
- By invitation link or username.
Important
When adding students, make sure their role is set to: ✅ User and not: ❌ Admin
This ensures that students can use the project resources without being able to modify project settings.