Import & Export of Data
Importing data
Temporary import solution
Currently, to import data to/from your TAAURUS project, you need to submit a service request.
Important: The service request must be submitted by the Principal Investigator (PI) of the project.
Submit a service request at: https://serviceportal.aau.dk/
Please describe in your service request:
- What should be imported
- How much data (size/volume)
- Where the data comes from (source location)
Exporting data
To export data from your TAAURUS project, you can use the SP Exporter application. Follow these steps:
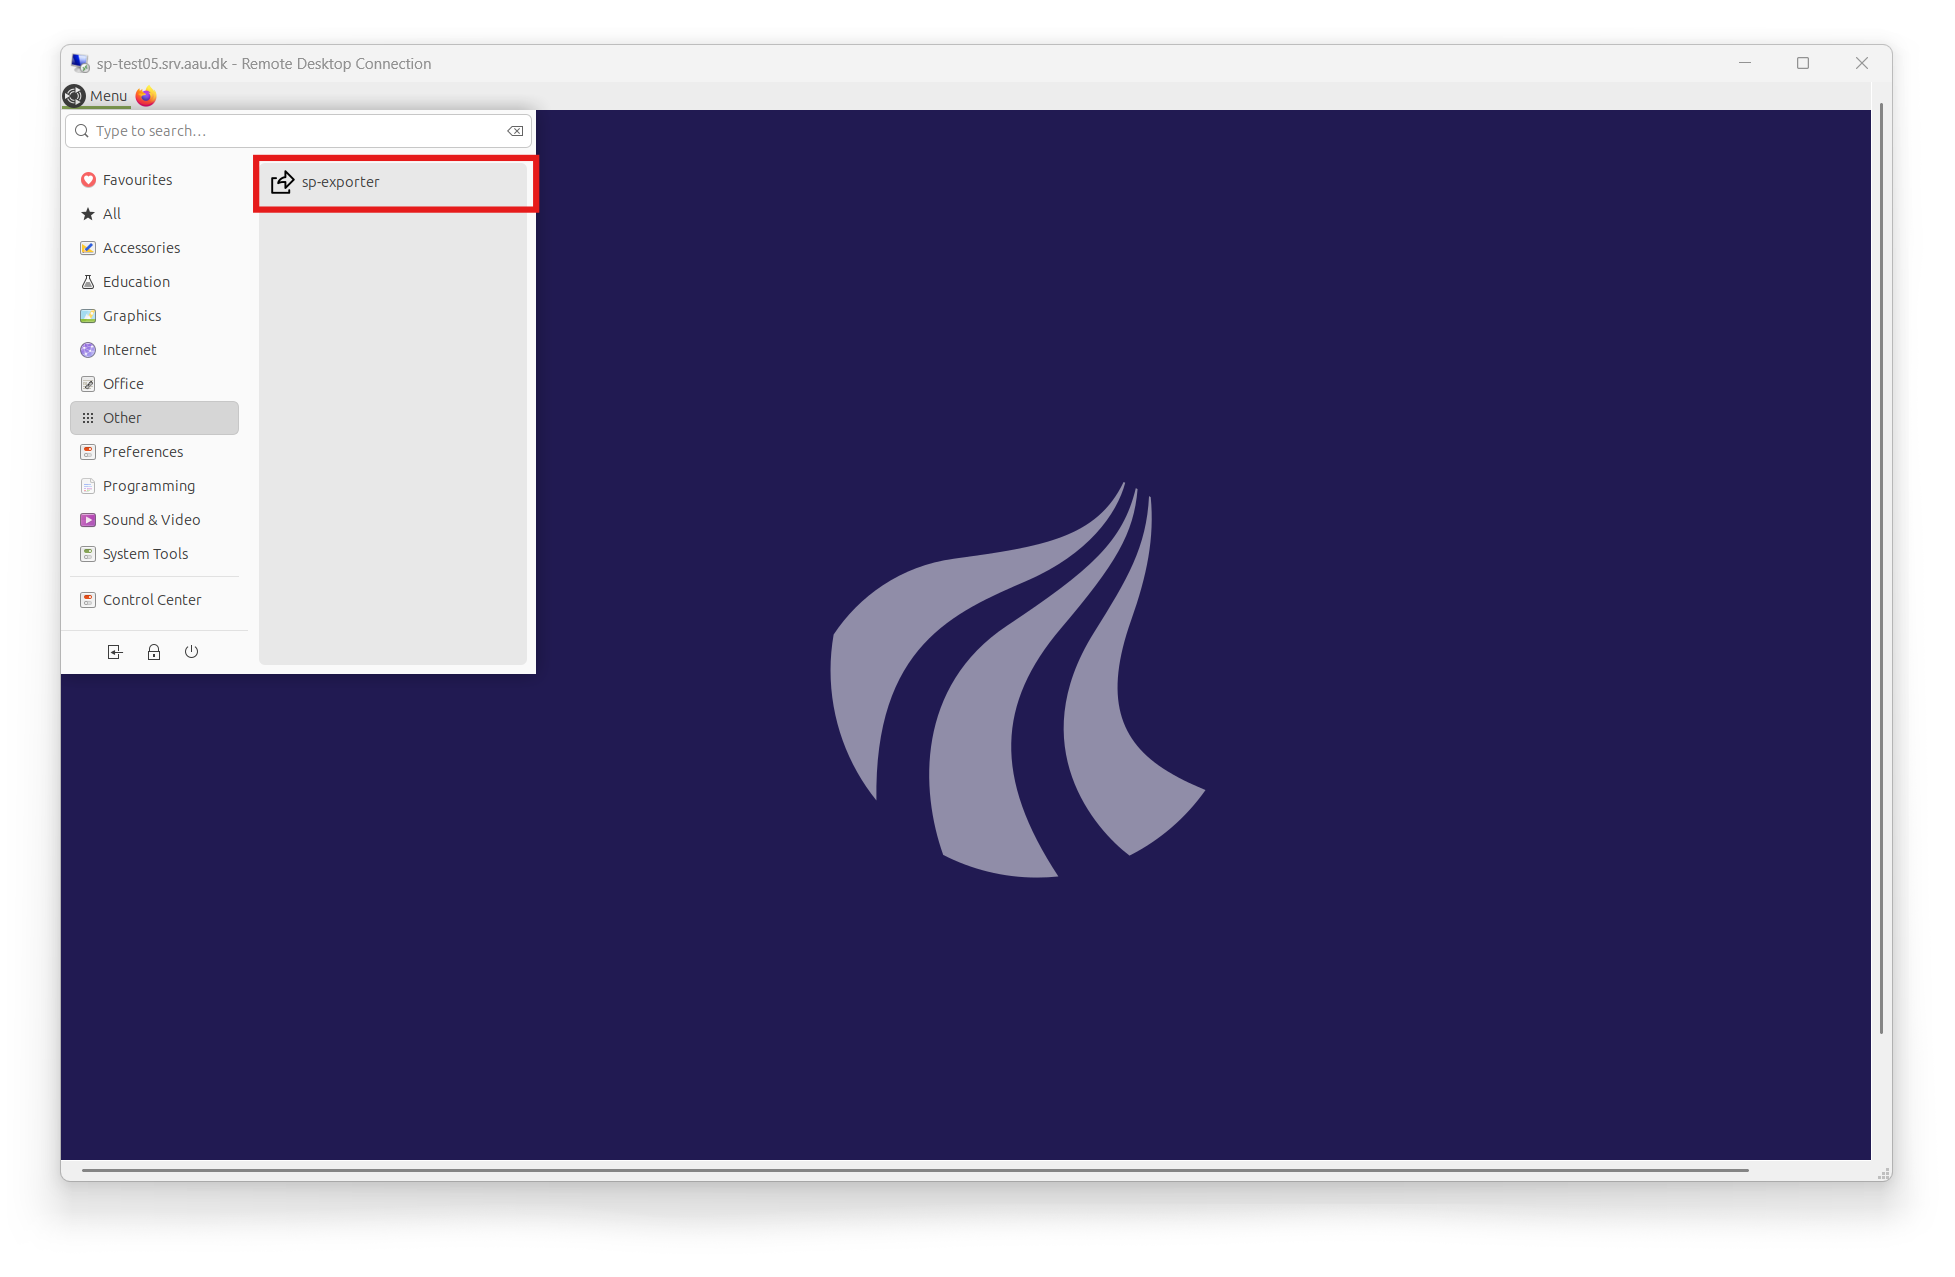
Step 1: Open SP Exporter
- Click the Menu button in the top-left corner of your remote desktop.
- In the search bar, type
sp-exporter. - Select sp-exporter from the search results to launch the application.
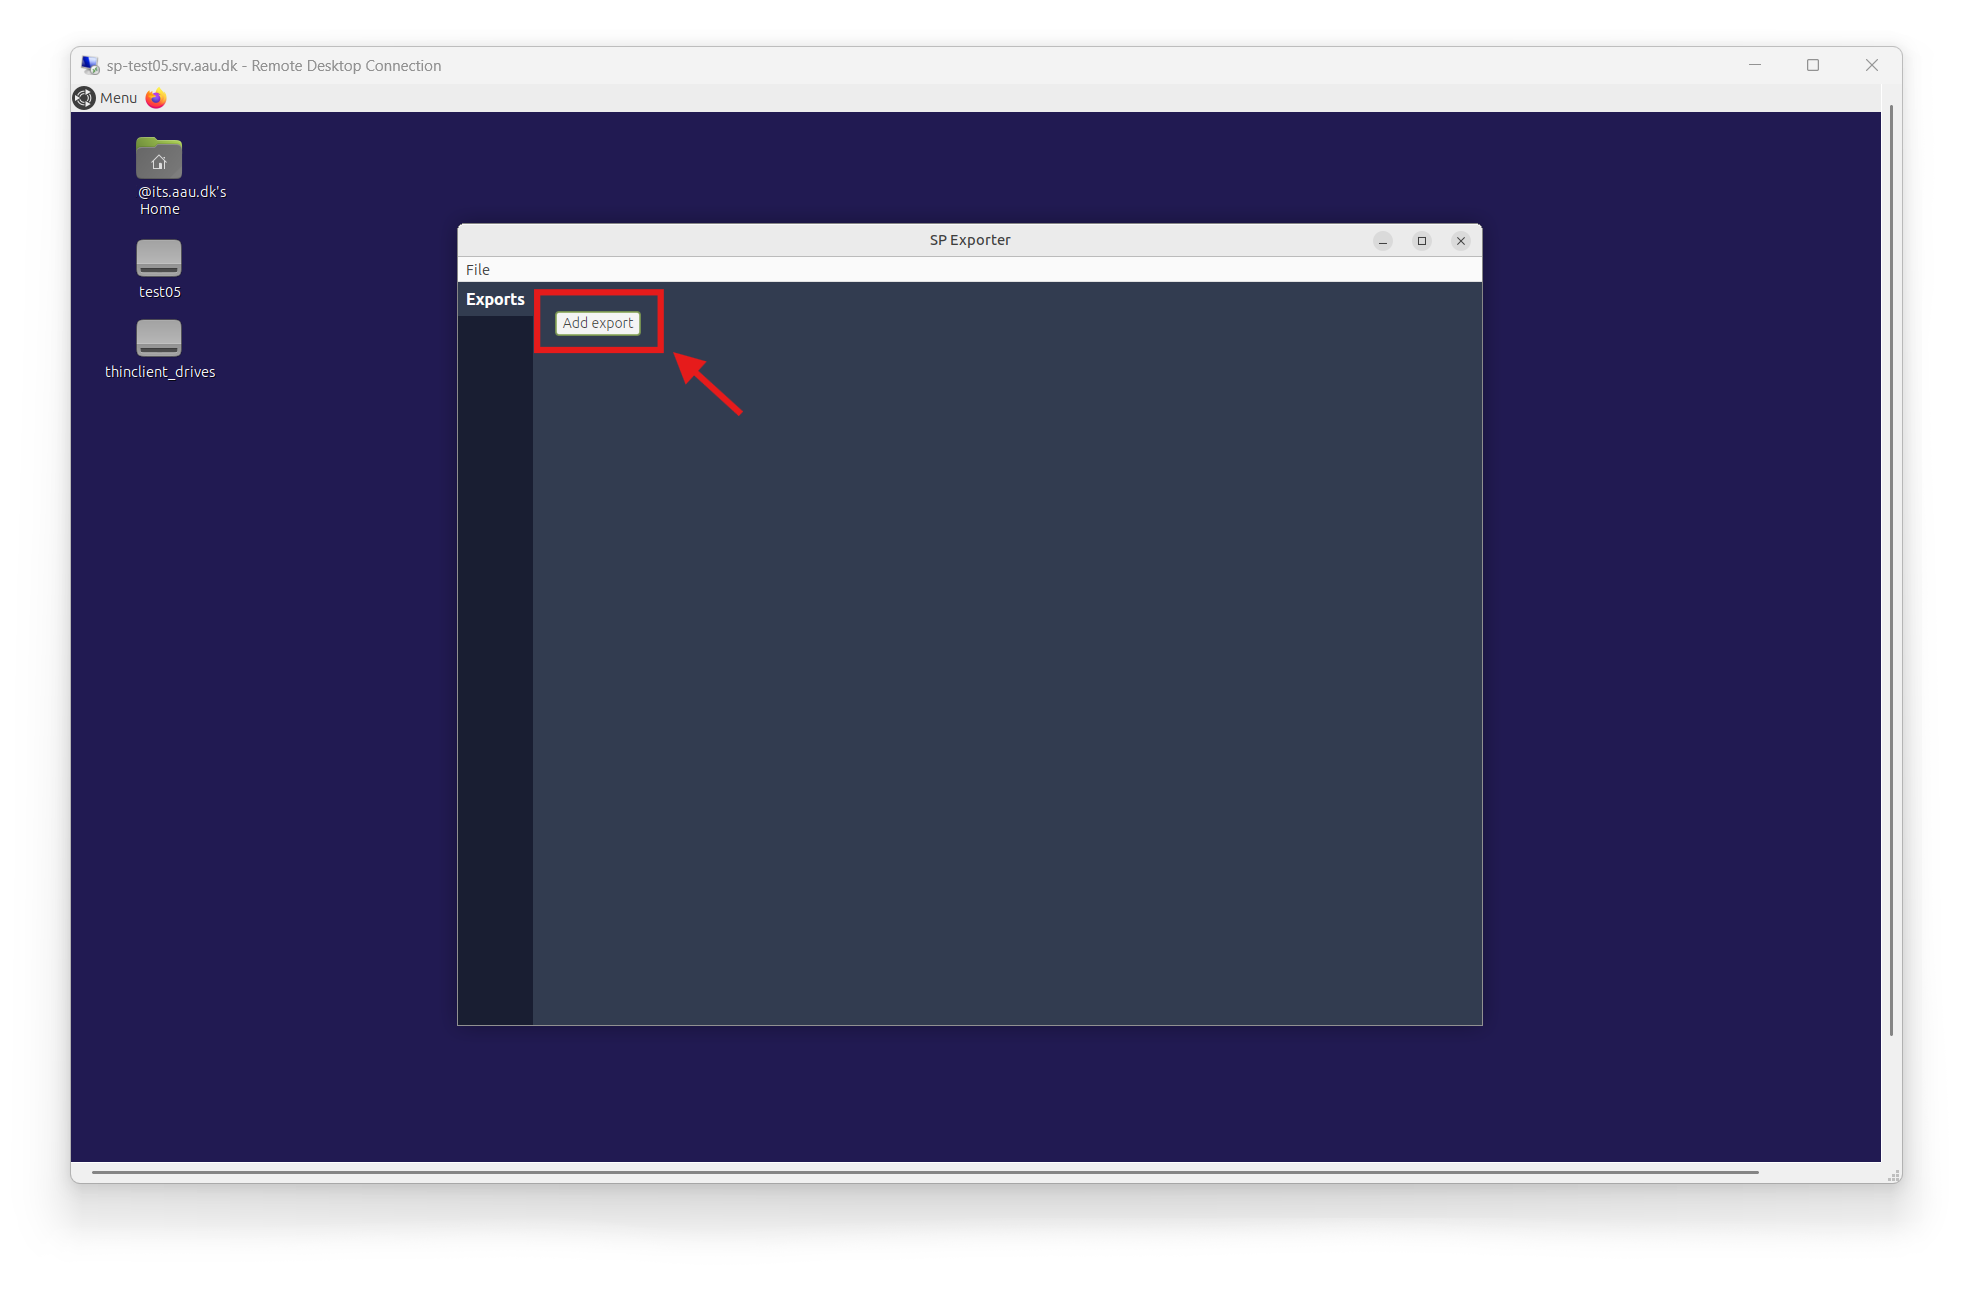
Step 2: Create a new export
- Once SP Exporter opens, you'll see the main window with an Exports section on the left.
- Click the Add export button to start creating a new export.
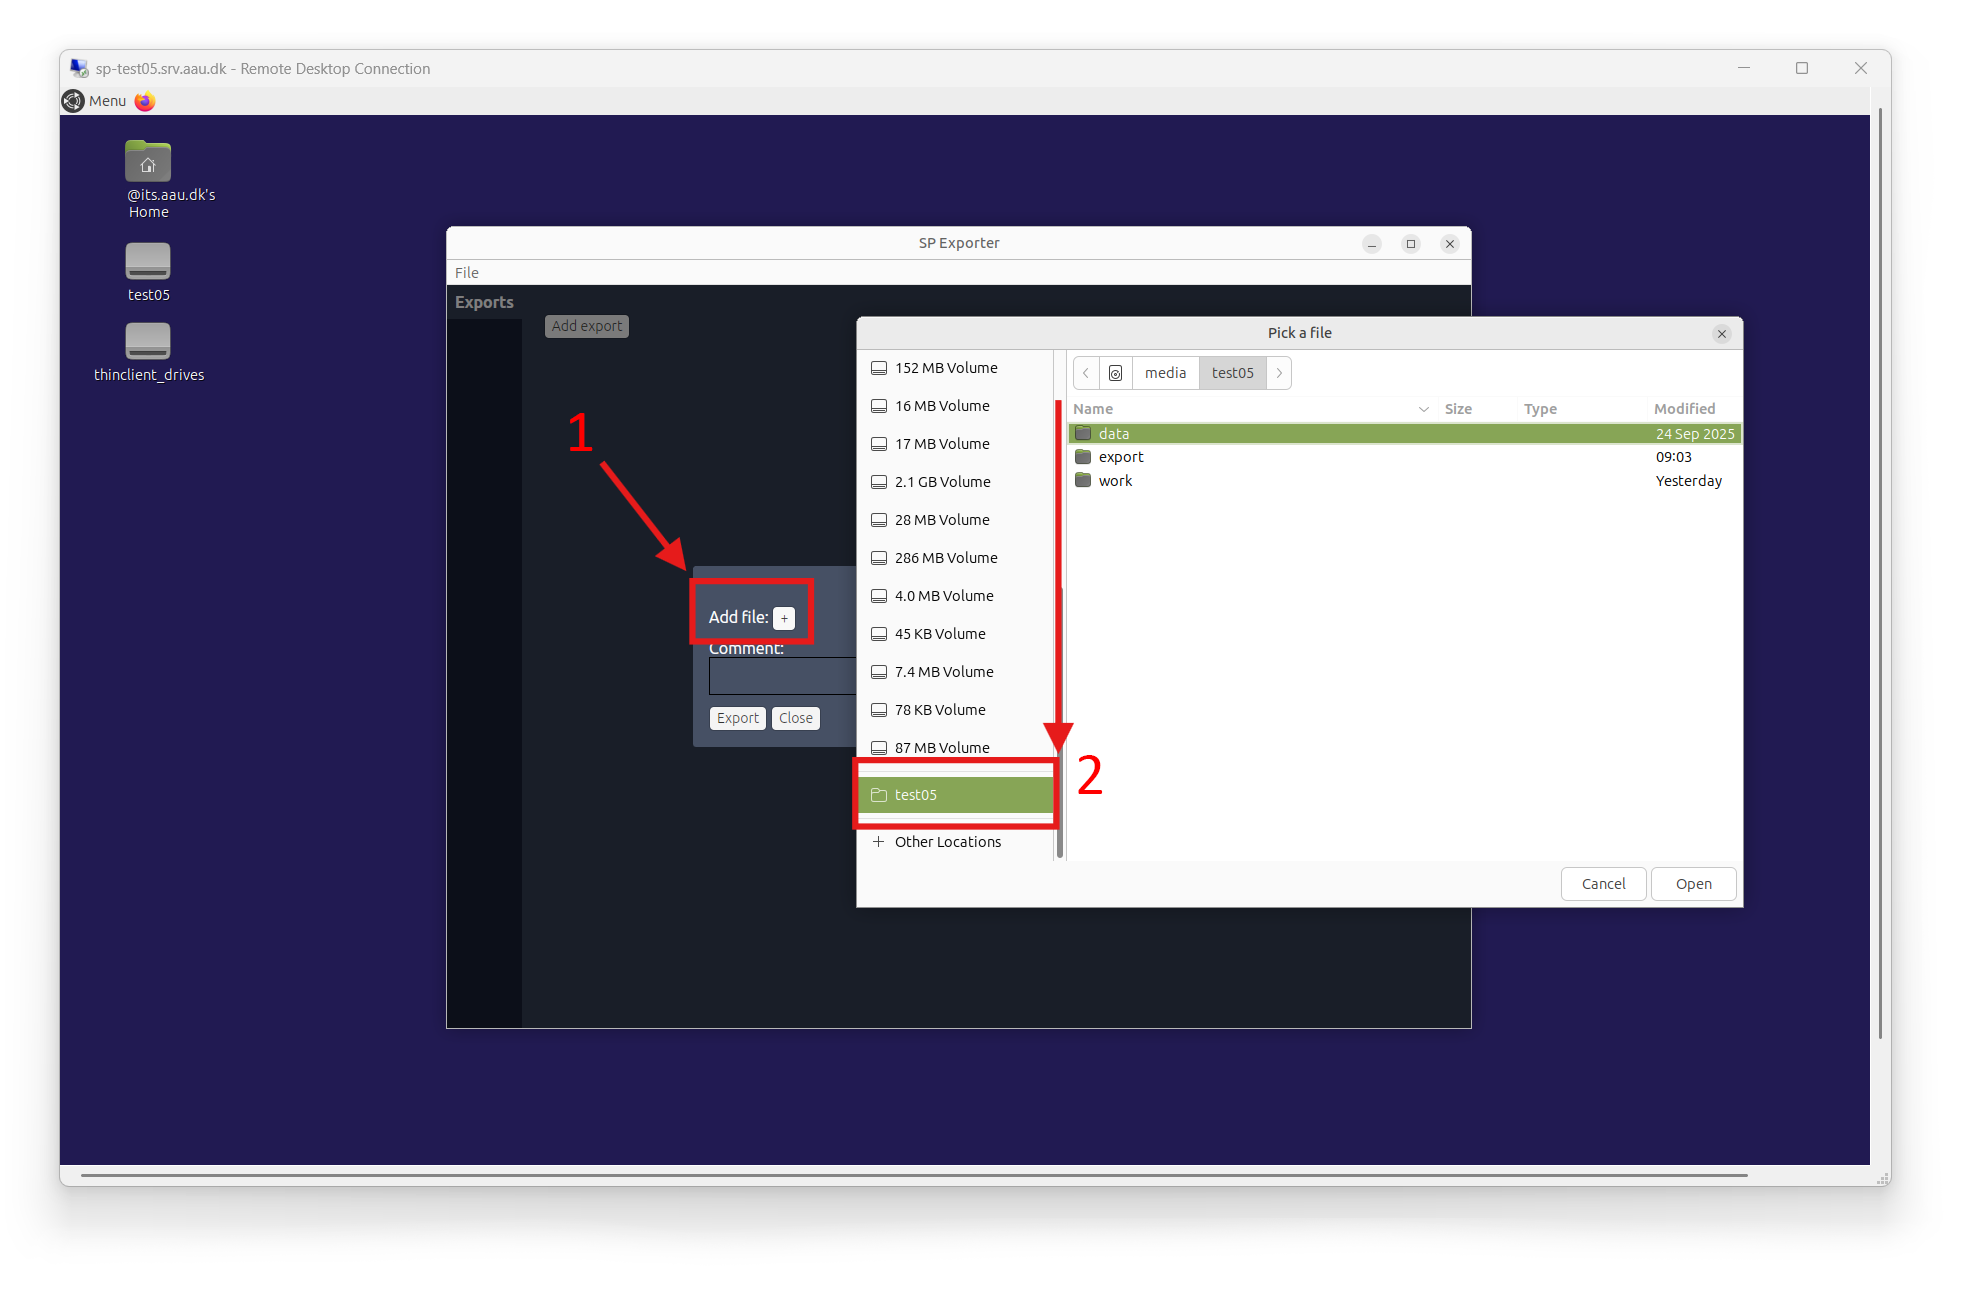
Step 3: Select file to export
- In the export dialog, click the Add file: button (marked with a plus icon).
- A file picker dialog will open. Navigate to the location of the file you want to export. The project directory is located at the bottom of the file navigation.
- Select the desired file from the file picker.
- Click Open to confirm your selection.
Exporting multiple files or folders
SP Exporter only allows you to select a single file at a time. To export multiple files or entire folders, you need to compress them first using the file manager:
- Open the file manager (not the file picker dialog) and navigate to the files or folders you want to export.
- Select the files or folders you need.
- Right-click on your selection.
- Choose Compress from the context menu (this will create a ZIP, RAR, or similar archive file).
- Then, in SP Exporter, use the file picker to select the compressed archive file you just created.
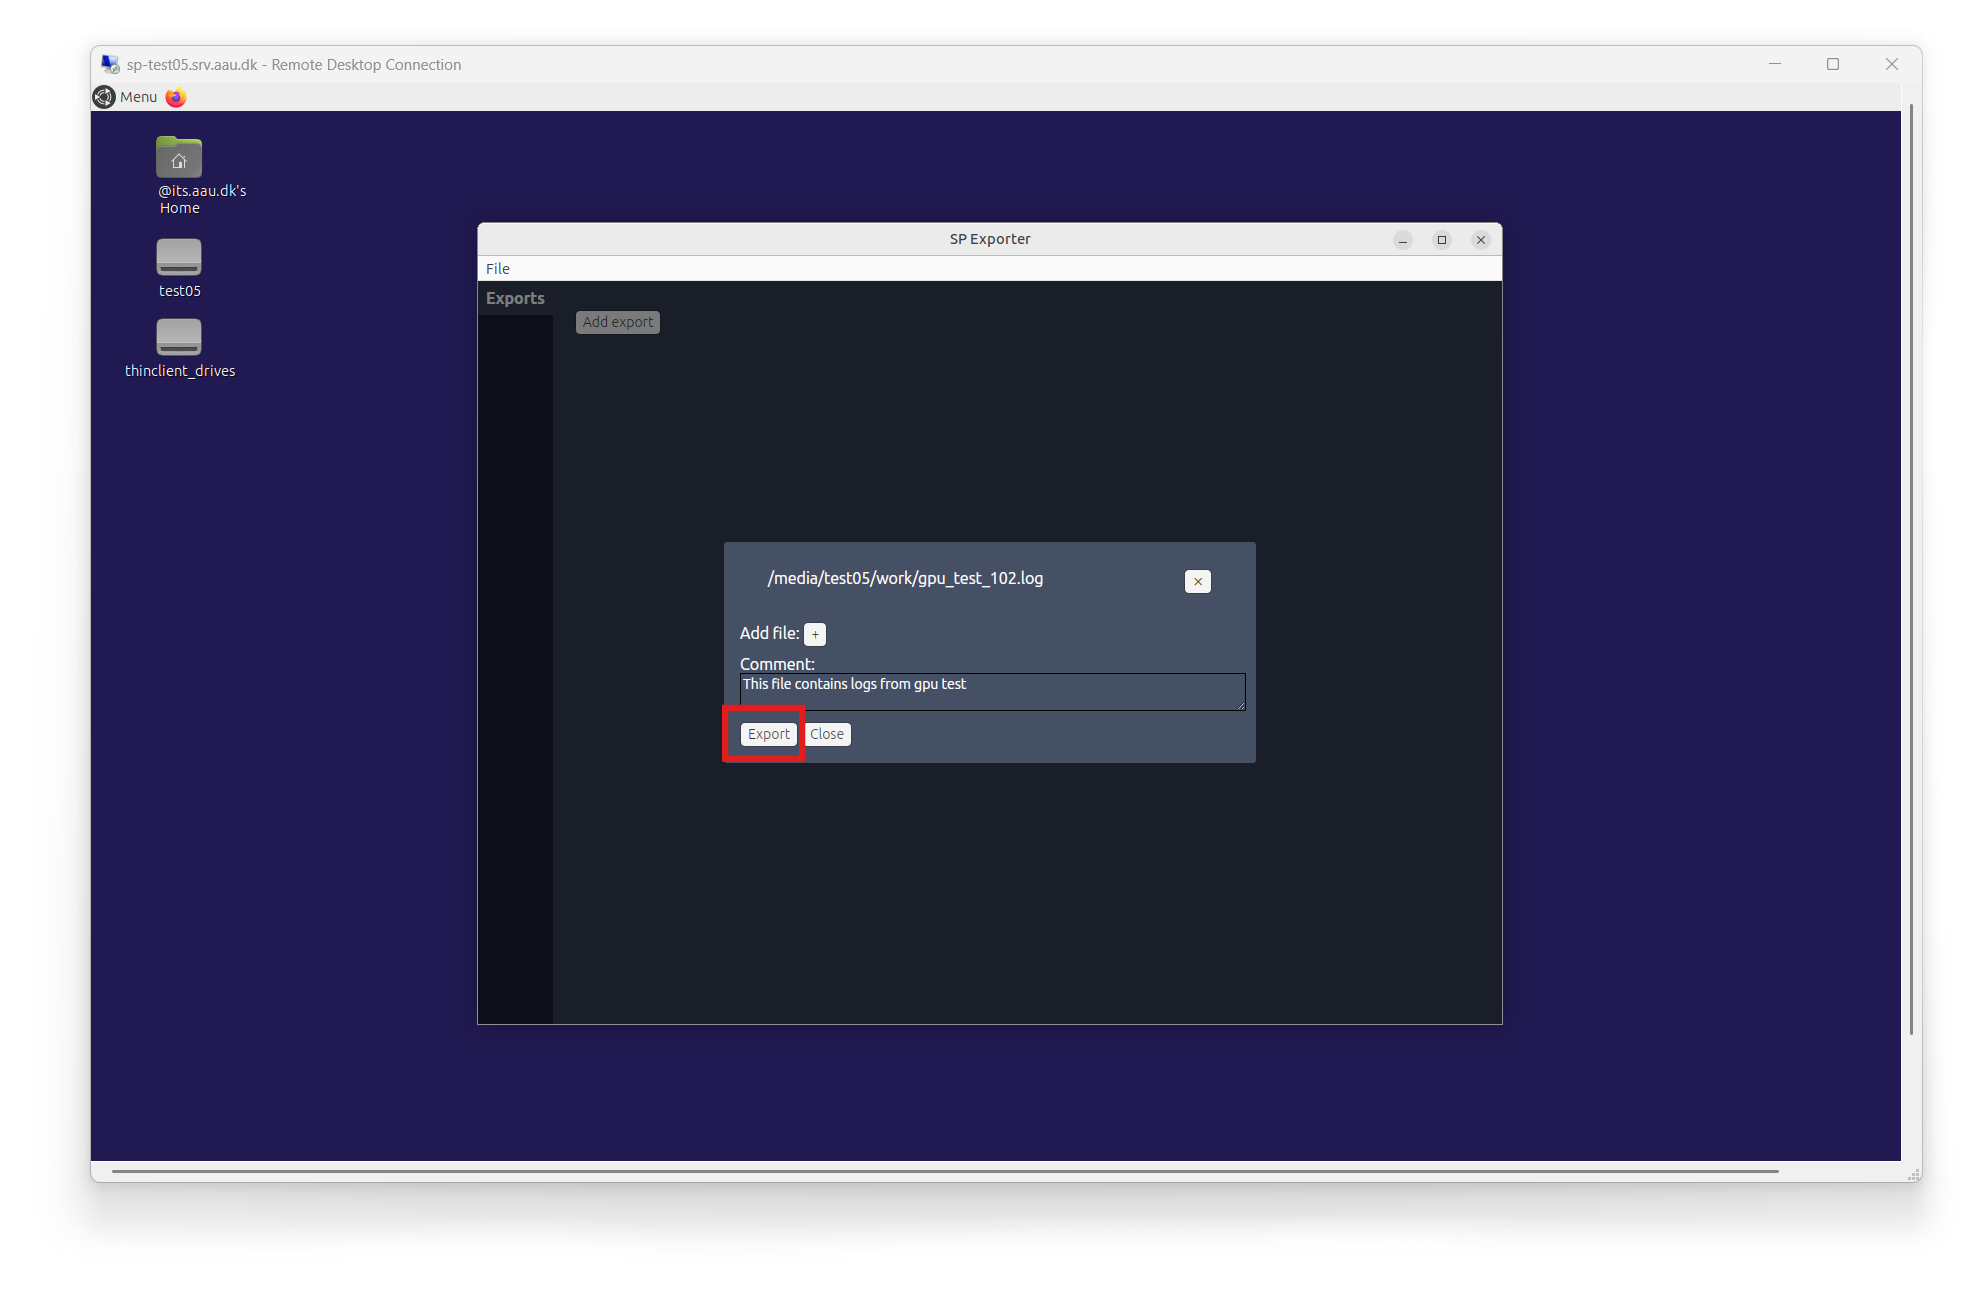
Step 4: Add a comment and export
- After selecting your file, you'll see it listed in the export dialog.
- Optionally, add a comment in the Comment: field to describe what you're exporting (e.g., "This file contains logs from gpu test").
- Review the file path shown in the title bar to ensure you're exporting the correct file.
- Click the Export button to submit your export request.
Step 5: View export status
After submitting an export, you can view its details in the SP Exporter window:
- Date: When the export was created
- ID: Unique identifier for the export
- Approved: Approval status (shown as an orange dot if pending)
- Description: The comment you provided
- Files: List of files included in the export
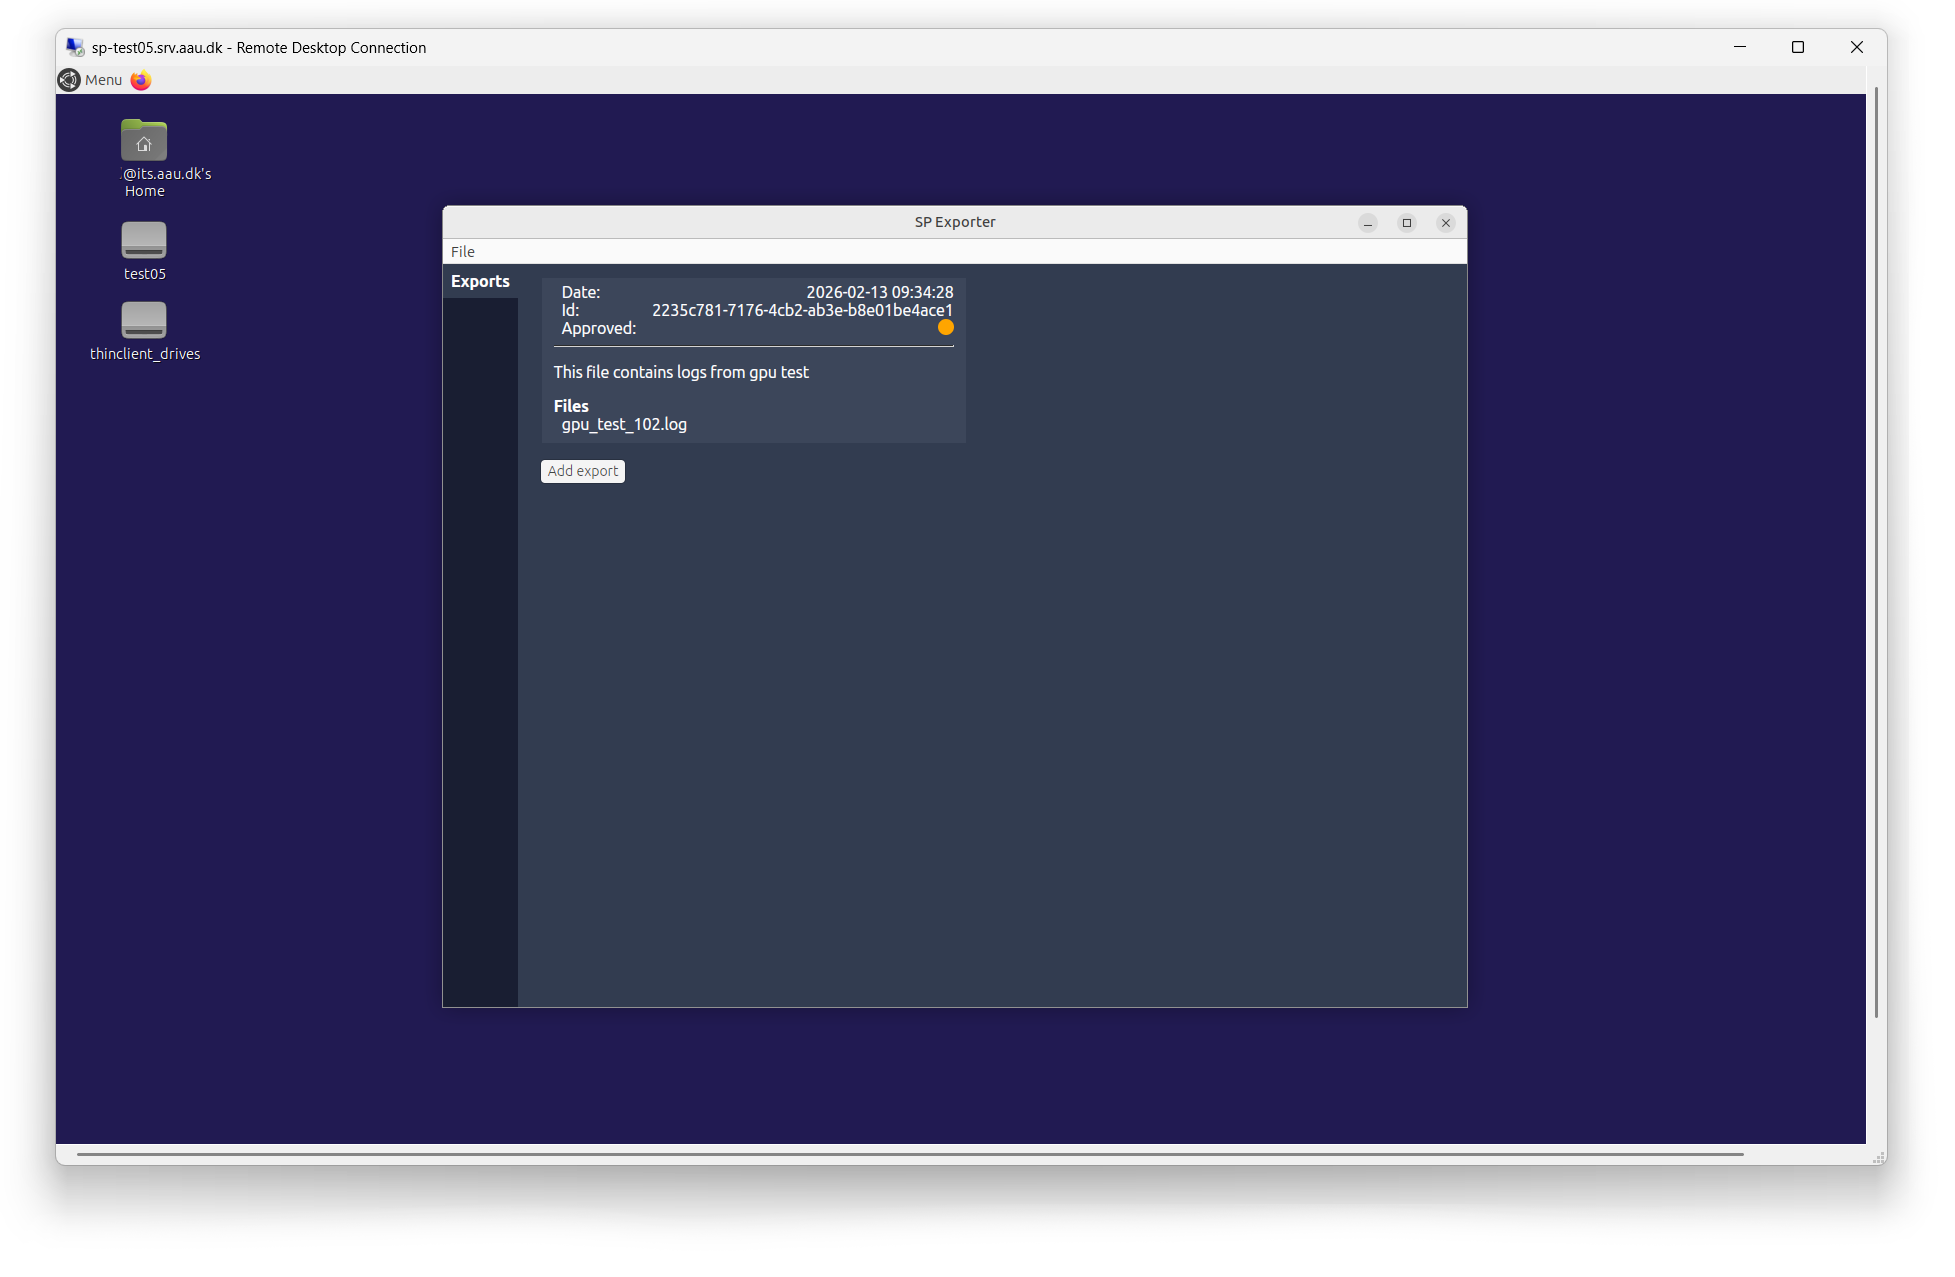
Export approval
Exports require approval before they are processed. Check the approval status in the export details. Once approved, you'll be able to download your exported data.
Step 6: PI Approval
Before an export can be downloaded, it must be approved by the Principal Investigator (PI) of the project. The PI can approve exports using SP Exporter:
- Open SP Exporter on the TAAURUS remote desktop.
- In the Approve section, you'll see pending export requests with their details (Date, ID, User, Files).
- Review the export request details to ensure it's appropriate.
- Click the Approve button to approve the export request.
Once approved, the export will be processed and made available for download.

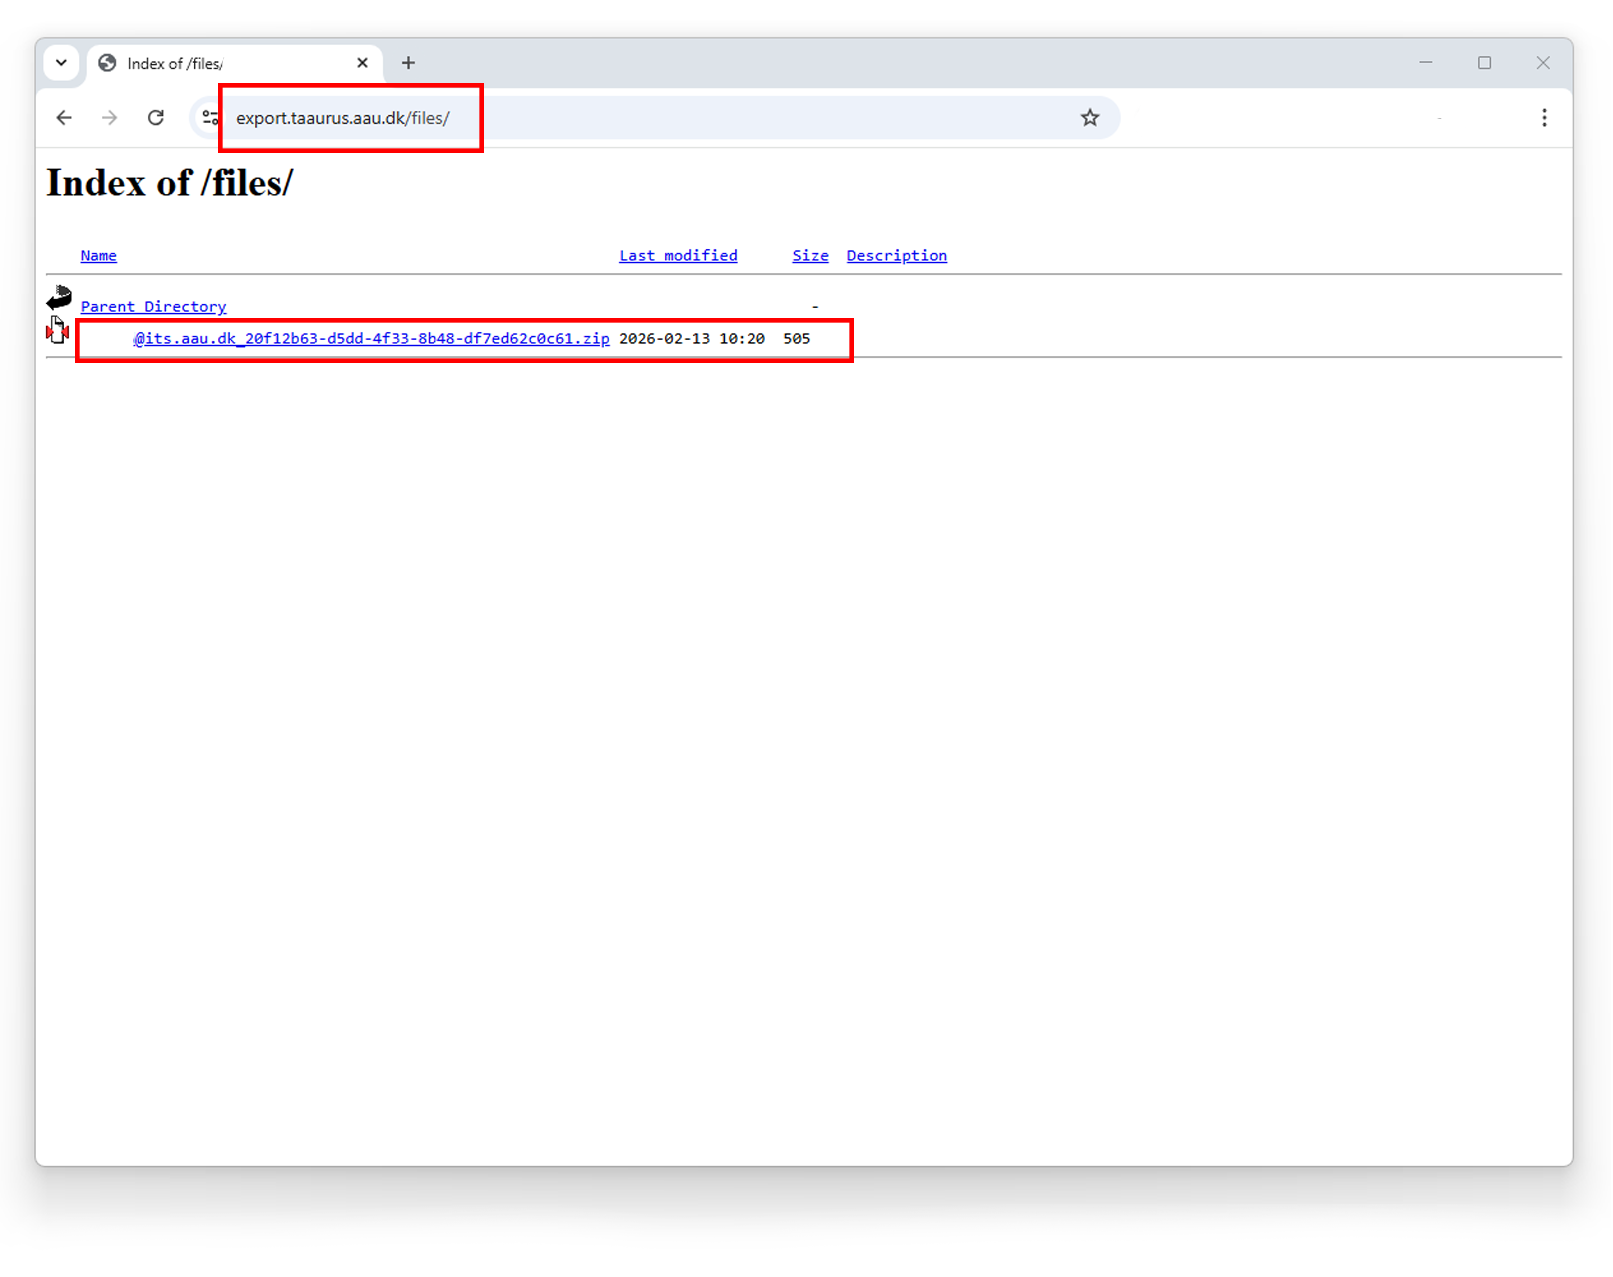
Step 7: Downloading Approved Exports
After your export has been approved by the PI, you can download it from your local computer:
- Connect to the AAU network - You must be connected to the AAU network (either on-campus or via VPN).
- Open your web browser and navigate to:
export.taaurus.aau.dkand login with your AAU credentials. - You'll see a directory listing with your approved export files (ZIP archives).
- Click on the export file you want to download (e.g.,
@its.aau.dk_20f12b63-d5dd-4f33-8b48-df7ed62c0c61.zip). - The file will download to your computer.