Expanded UCloud project application guide
This is a detailed guide for project applications in on UCloud platform
Projects (Applying for Additional Resources)
If you need additional resources (GPU, VMs, larger quotas, or sensitive data access), you must apply for a project.
Before applying for a project you must ensure that you understand the classification level of your data, and that you understand the restrictions on and limitations of the platform (Terms and Conditions).
Data classifications 2 and 3
- If you have data with classification 2 or above, you must follow the Procedure for working with sensitive data on UCloud projects.
- At AAU, if your project includes any data with classification levels 2 or higher, you are required to have your research registered for the inclusion of GDPR sensitive data with the Department of Grants and Contracts. Once registered you will be informed of the WorkZone case number that is allocated to your case before you will be permitted a project on UCloud.
- Students are excluded from this registration process.
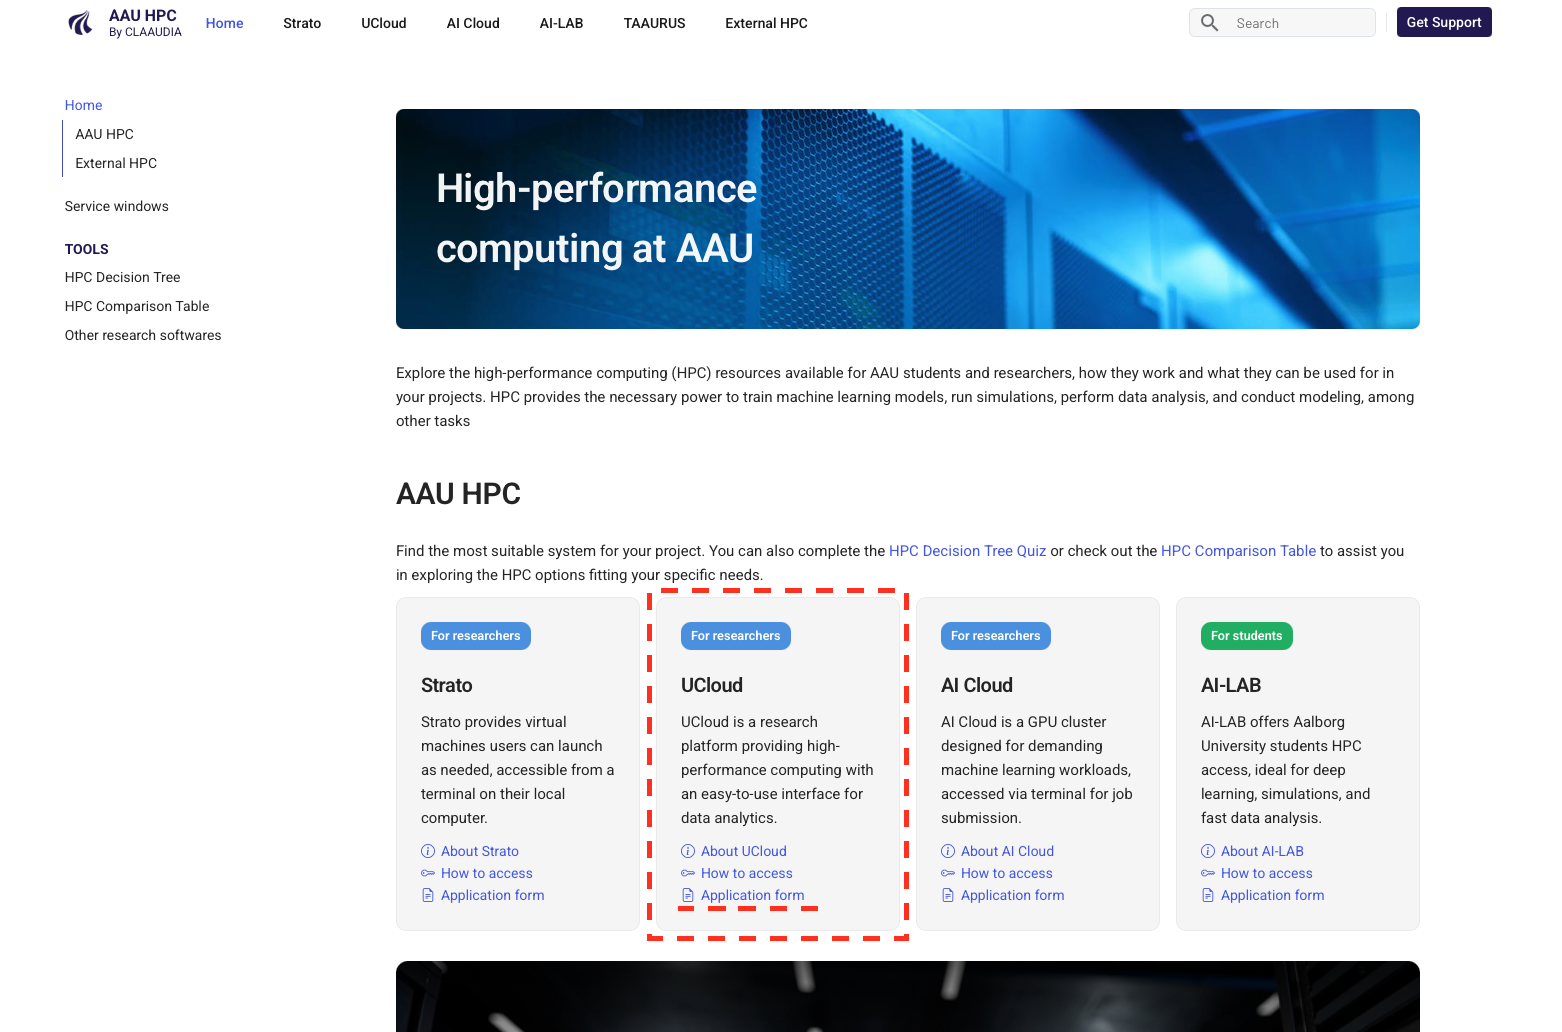
Step 1: Open the project application form
Browse to hpc.aau.dk, scroll down to reveal the platform tabs, find the UCloud tab, and click on the link to the Application form.
Step 2: Fill in the application form
There is information provided in the application form regarding the individual products and resources, that you should read before making product selections.
Transcription section
- There is a special section dedicated to projects that wish to use transcription services. This is to simplify the process of selecting the correct underlying resources for people who just want to run some transcriptions.
- If you are not are not using Transcriber, or if you just want to choose your own selection of compute and storage resources, you can just answer "No" to whether or not this is a Transcriber project.
NOTE: Allocations are made for whole calendar months, starting from the first day of the current month
An application made on the 25 April 2026, for 3 months, will start from 01 April 2026 and run for 3 calendar months.
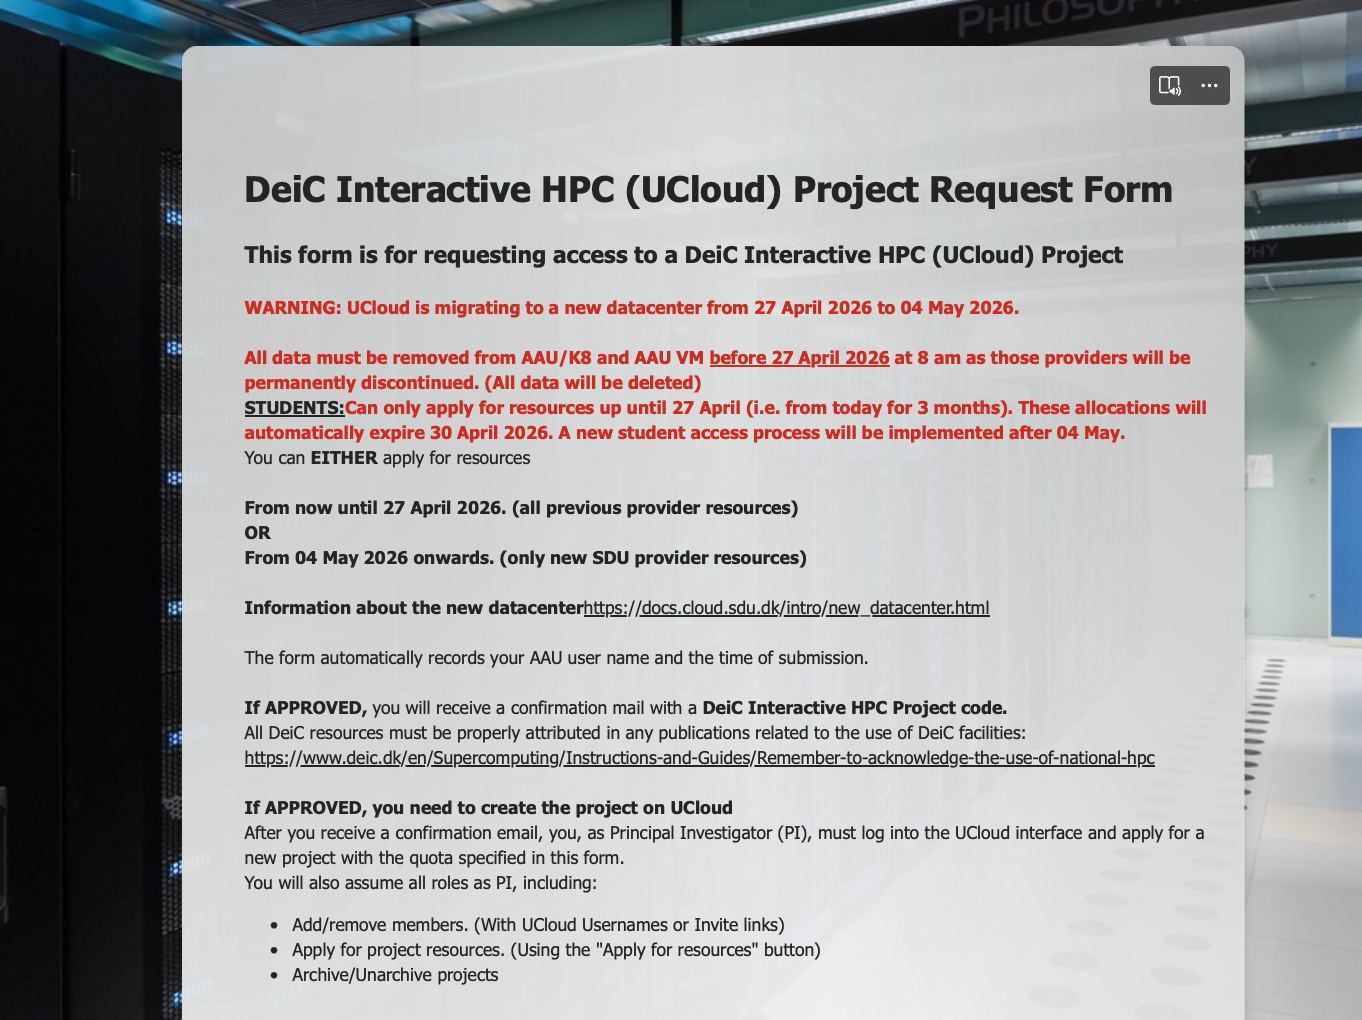
UCloud migration warning
Ensure that you are aware that the start date for your project application matches the timeframes where resources are available.
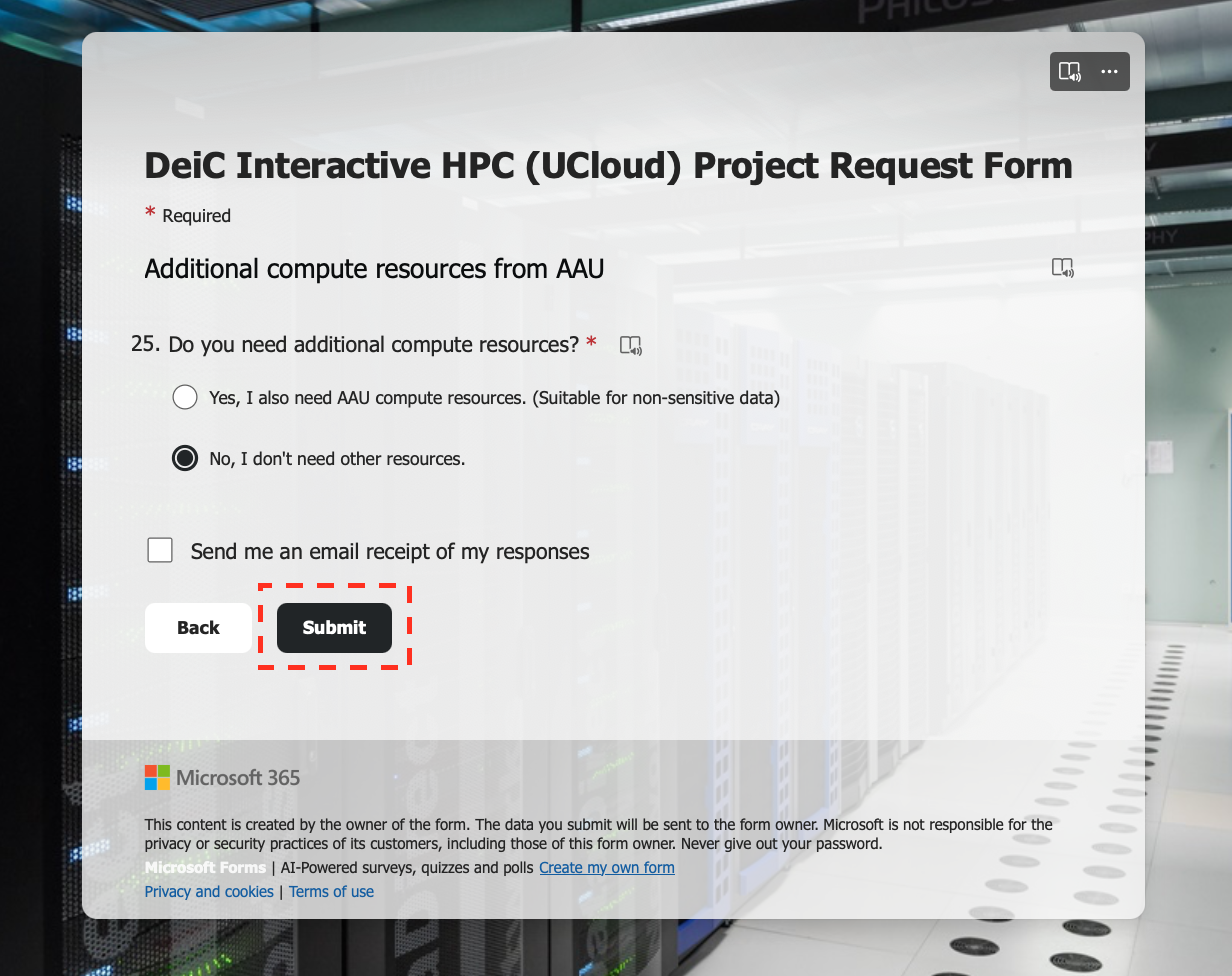
Step 3: Submit the application
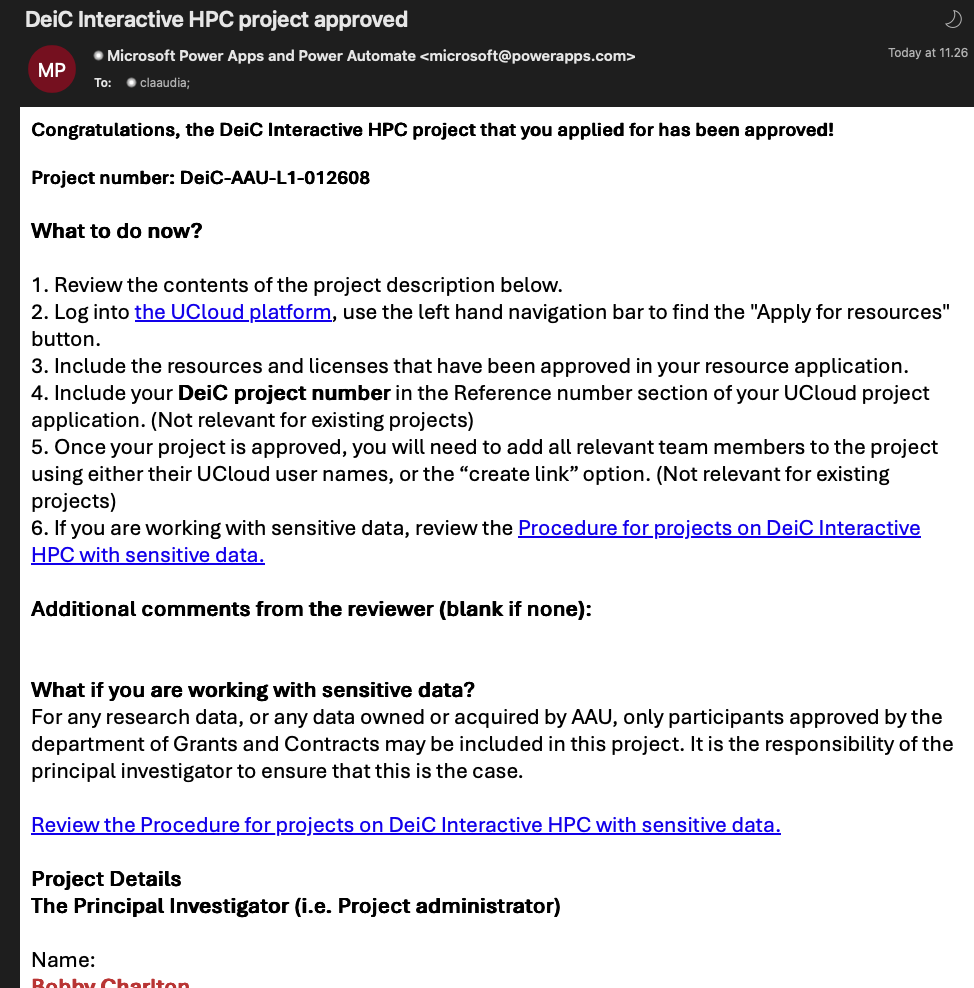
Step 4: Approval by CLAAUDIA
You will receive an email from CLAAUDIA, including basic instructions for what to do next, and a summary of the resources that you have been approved to add to your UCloud project.
Included in this mail is your DeiC project number. This is the number you will need to use in future if you need to apply for additional resources in your project.
Step 5: UCloud interface project application
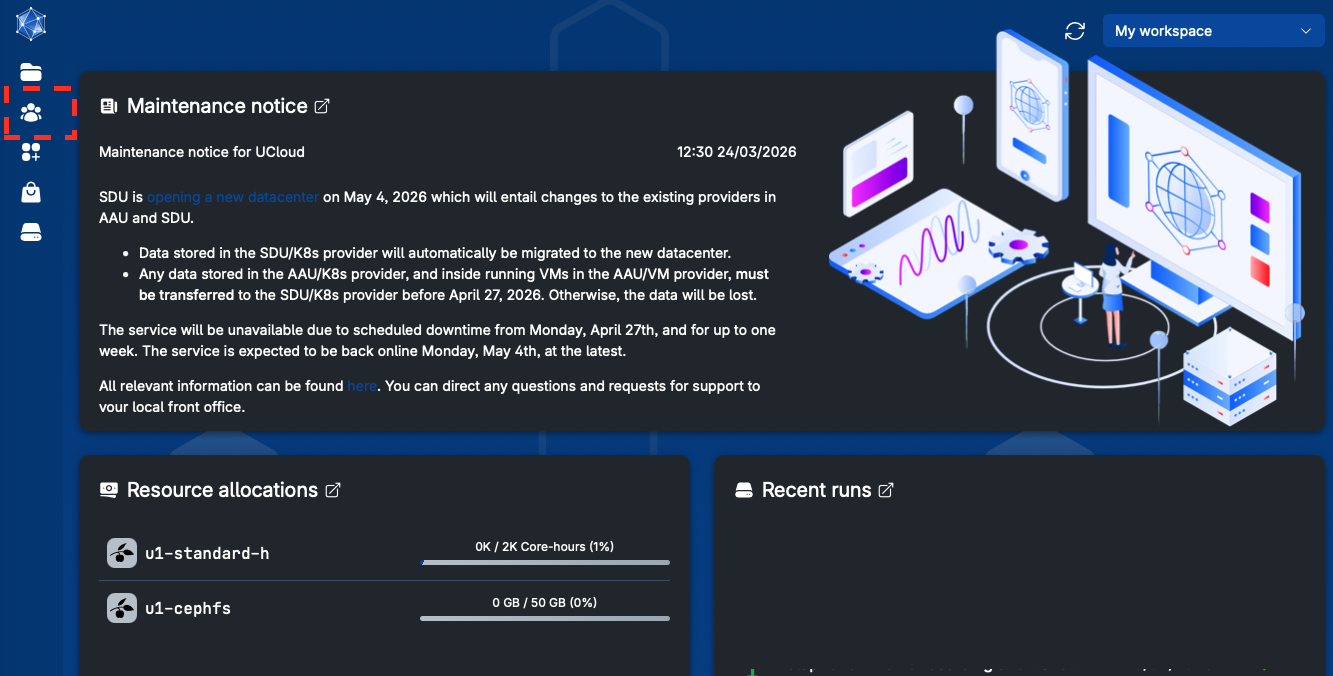
Browse to the UCloud interface and navigate to the project icon in the left-hand side menu.
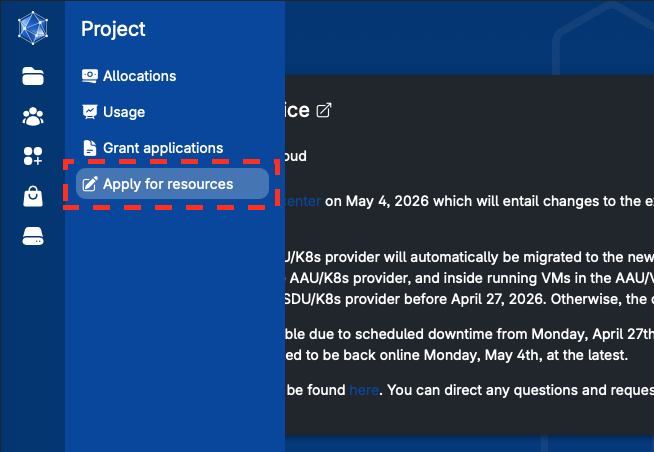
Step 6: Apply for resources
Select the "Apply for resources" option to open a project application form.
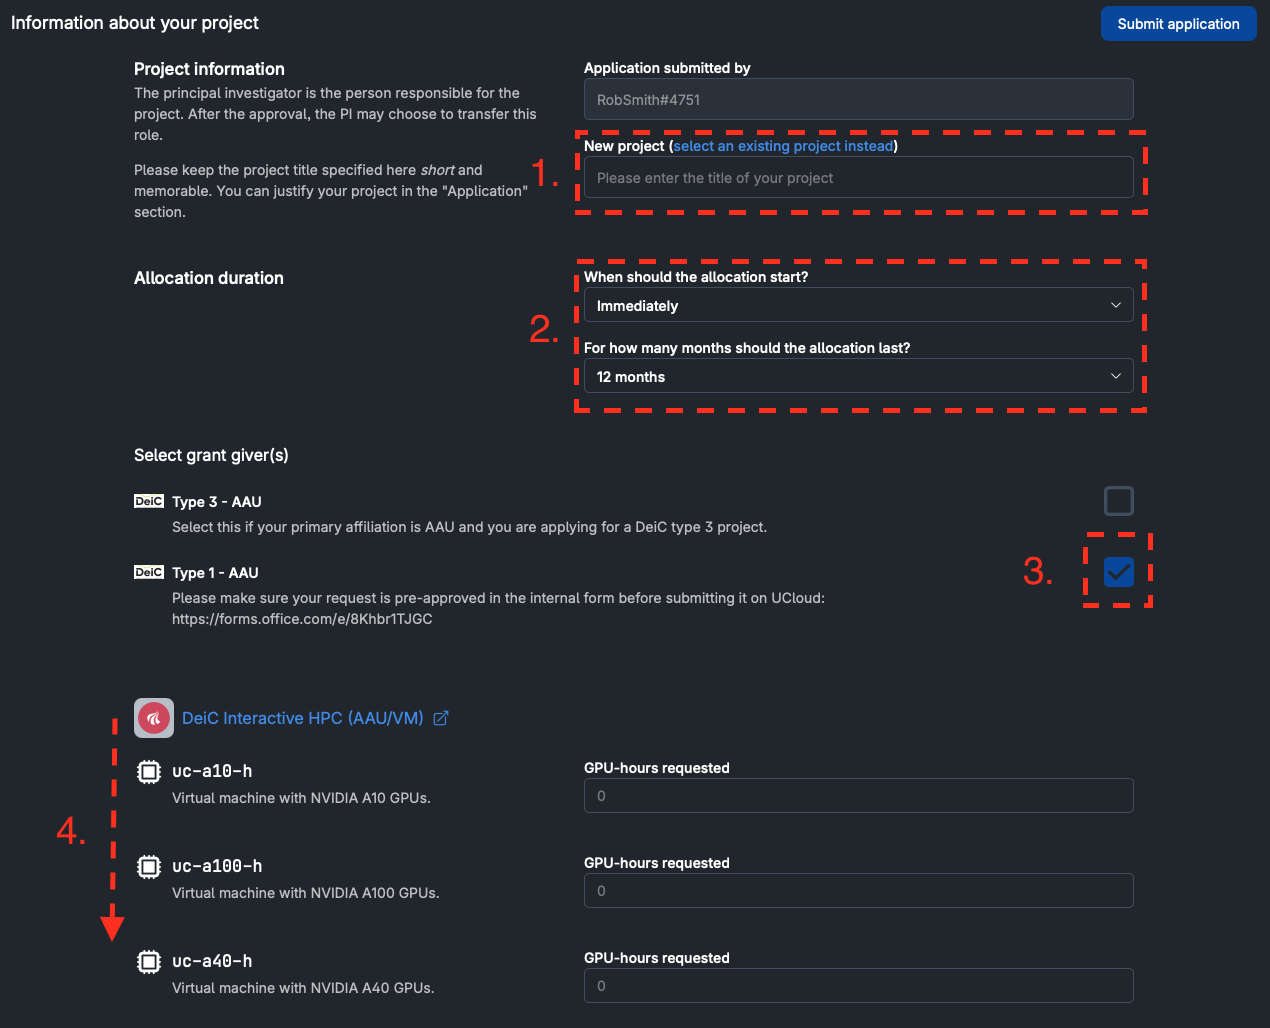
Step 7: Include the information from your approval in the UCloud resource application
-
The project title must be identical to the project title that you used in your CLAAUDIA application form.
-
The timeframe (start date and duration) selected in the UCloud interface must match the timeframe that you applied for in your CLAAUDIA application.
-
You must check the box for Type 1 - AAU resources.
-
You should navigate down to the provider you have been approved for. (from 01 May 2026 there will only be 1 provider, I.e. SDU)
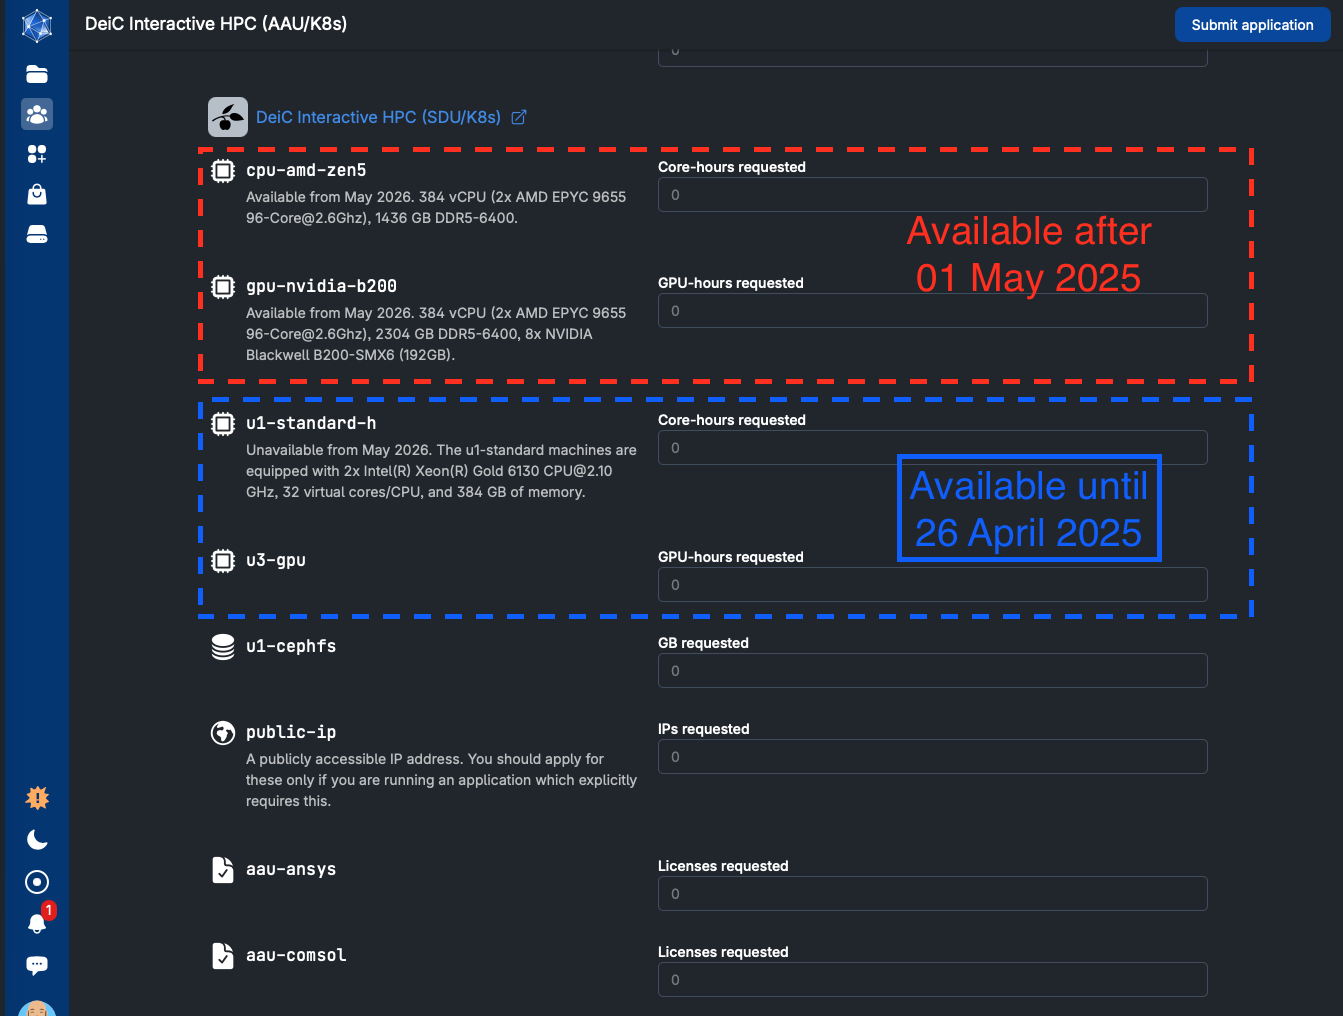
Step 8: Be aware of the platform migration
The SDU resources are clearly marked for whether they are available before or after the migration of the platform.
Applications that combine resources across the migration will be rejected
- The resources that are available after the migration may not be allocated before 01 May.
- All other resources (except for storage) will expire at 24:00 (Midnight) 26 April 2026.
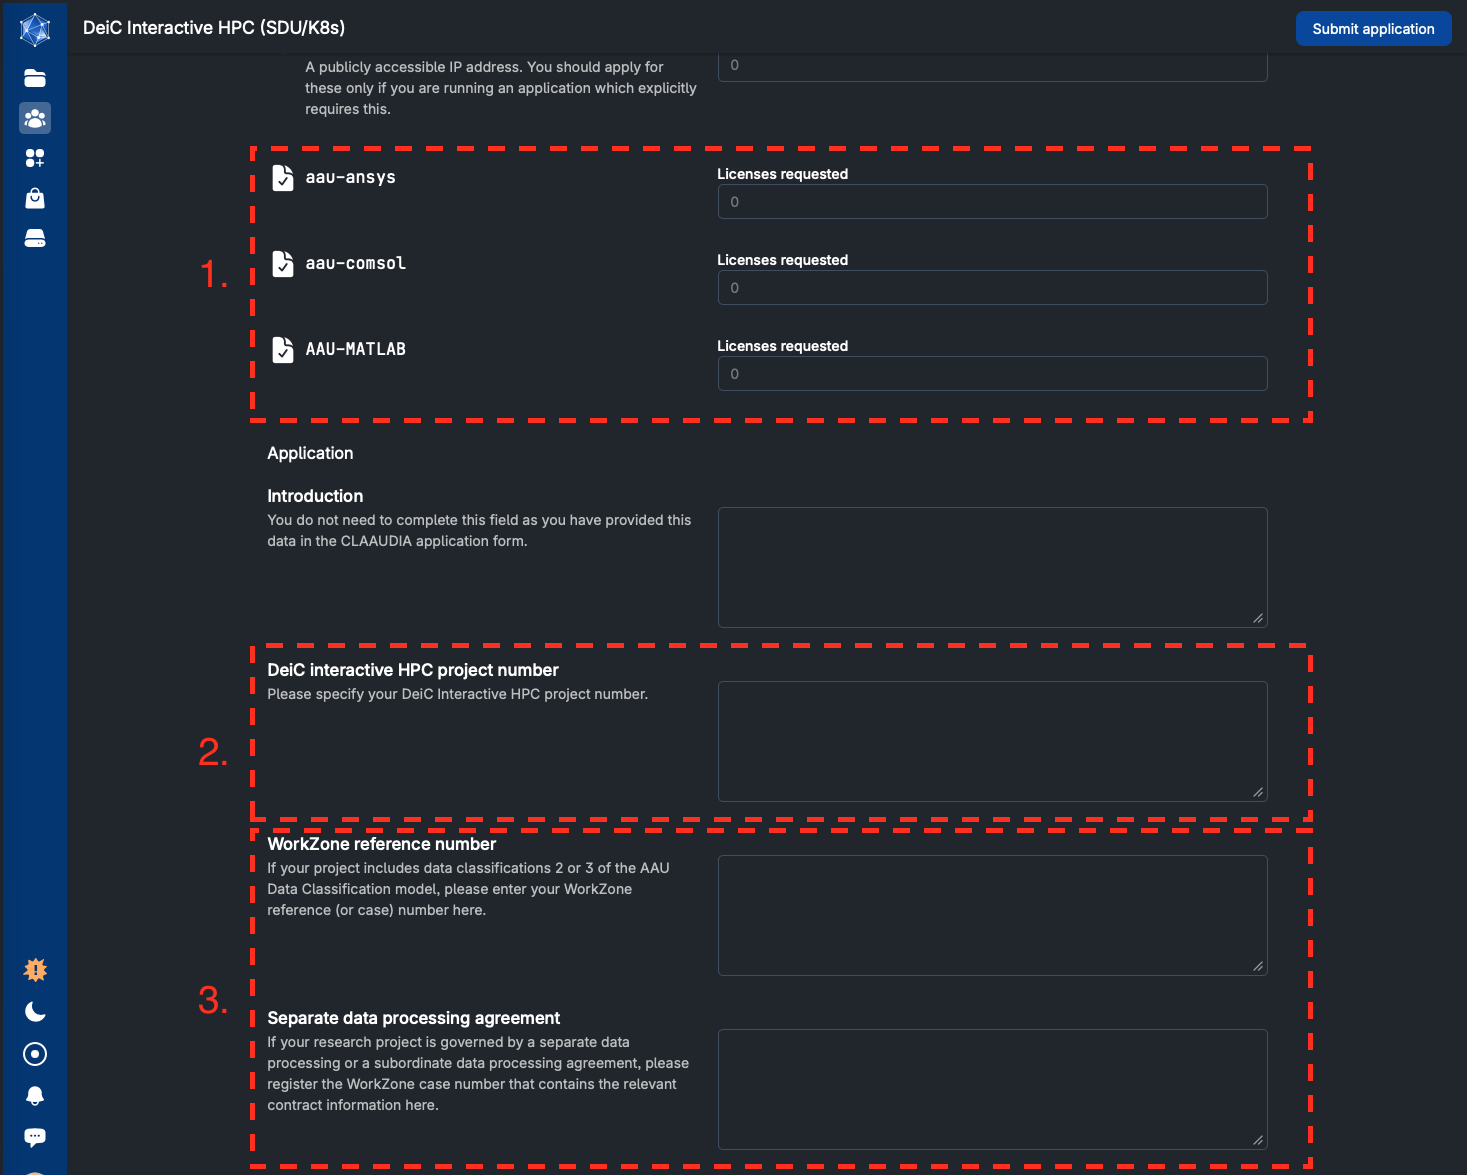
Step 9: Include licenses and DeiC project number and your WorkZone case number for sensitive data projects
-
If you have had the use of licensed products approved for your project you should include the number of licenses for each product.
-
All projects must include the DeiC project number of the approved application.
-
All projects with data classification levels over 1, must submit the WorkZone case number related to the registration of the research with GDPR sensitive data.
Some research groups have data processing agreements that apply to all sub-projects within the scope of those agreements. If your project is governed by a broader data processing agreement, you should submit the case number related to this GDPR registration in the Separate data processing agreement field, and leave the WorkZone reference number field blank.
GDPR registration of projects
- At AAU, if your project includes any data with classifications levels 2 or higher, you are required to have your research registered for the inclusion of GDPR sensitive data with the Department of Grants and Contracts. Once registered you will be informed of the WorkZone case number that is allocated to your case.
- We require the WorkZone case number.
- Students are excluded from this registration process.
Motivation not necessary
- All AAU UCloud applications are pre-approved by CLAAUDIA via the Application form that must be submitted from hpc.aau.dk. It is therefore not necessary to complete the Introduction field in the form.
Step 10: Find your new project once approved
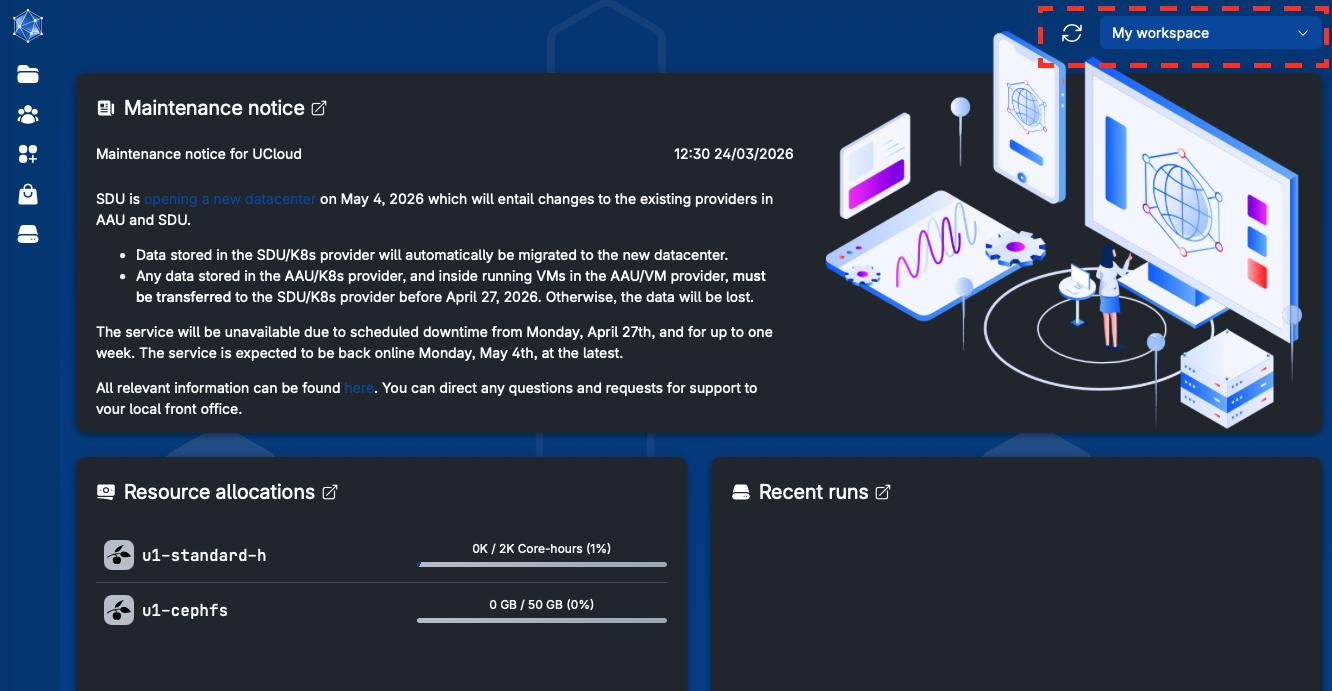
Once you project is approved, you will be able to find your new project space by navigating to the UCloud landing page (by clicking the UCloud icon in the top-left corner of the page), and then clicking on the project workspace dropdown in the top-right corner of the landing page.