Transcriber
Approved for data classification level
1 2 3Important: Sensitive data must be processed in a project
If you are working with sensitive data, you must run Transcriber from a dedicated project in UCloud — not from My Workspace.
Using a dedicated project helps ensure proper access control and compliance with data protection requirements.
If you haven't created a project, please see the Expanded UCloud Application Guide for step-by-step instructions on setting up your first project.
What is Transcriber
Transcriber is an application on UCloud designed to automatically convert audio and video files into accurate, readable text. It leverages advanced speech recognition models to transcribe spoken content, making it easier to analyze, search, and share information from interviews, lectures, meetings, podcasts, and other recordings. Transcriber helps researchers save time and effort by providing fast, reliable transcriptions directly within the secure UCloud platform — no technical expertise required. Whether you need simple text output or more advanced features like speaker identification and multiple file formats, Transcriber streamlines the process of turning your recordings into useful, accessible documents.
Handling sensitive data
Review UCloud guidelines:
Please make sure to review and follow our guidelines for handling sensitive data to ensure you understand how to work securely and meet all data protection requirements when using UCloud.
Which Transcriber should I use?
There are two ways to use Transcriber on UCloud:
| Interface (Default) | Batch |
|---|---|
| Simple, modern screen with buttons | No screen, just settings interface |
| Designed for most users | Designed for advanced users and batch jobs |
| Add files by drag and drop from computer or UCloud folders | Add files from UCloud folders only |
| Download results from the app or UCloud folders | Download results from UCloud folders |
| Basic settings: language and model selection | Advanced settings: language, model, number of speakers, and merge speaker entries |
Select the guide of your choice below for step-by-step instructions for each version.
This guide will walk you through using the latest default version of Transcriber, featuring an improved, user-friendly interface for transcribing your audio and video files on UCloud.
1. Using the Transcriber default (Interface) application
1.1 Finding and launching the application
-
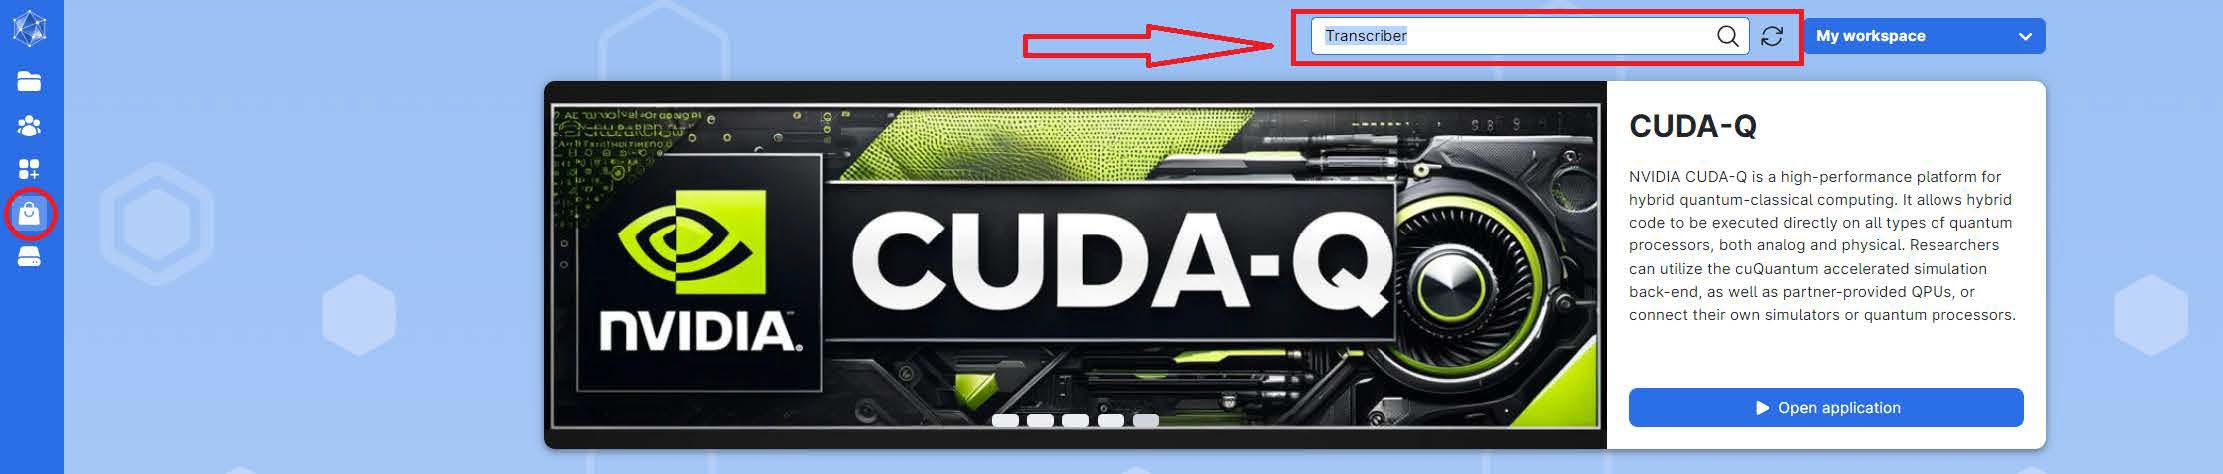
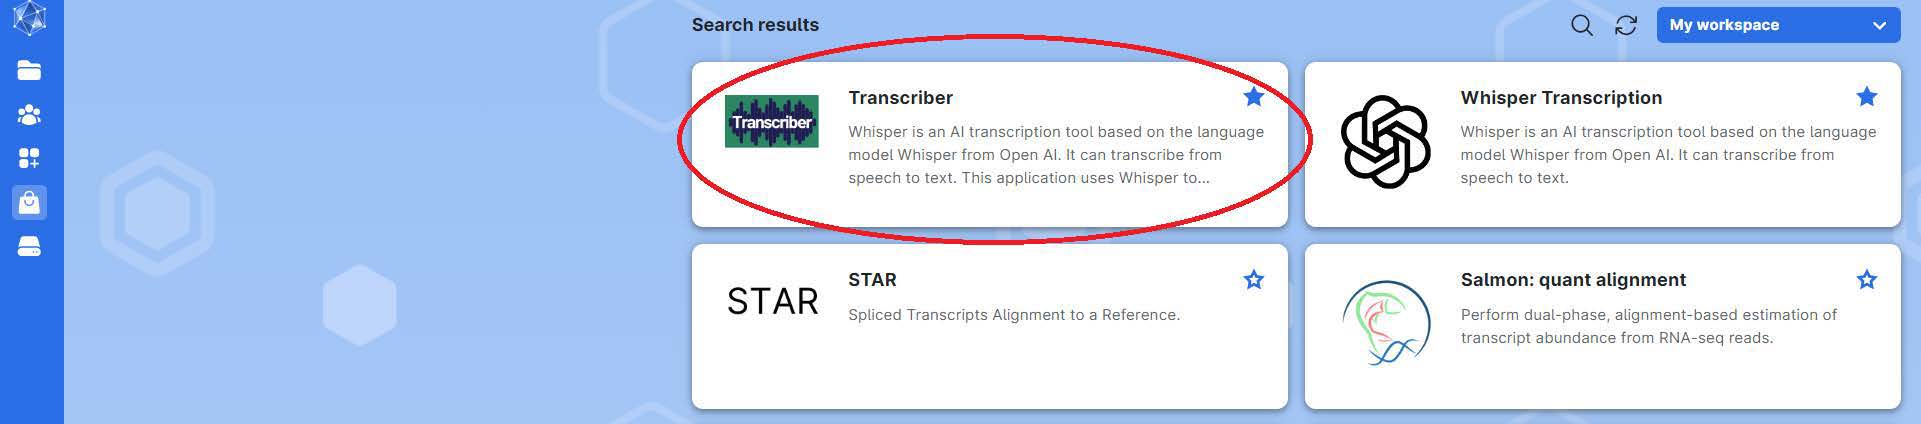
Go to the UCloud application page and use the search function to find Transcriber.
-
Open the app by clicking on Transcriber.
1.2 Configuring your job
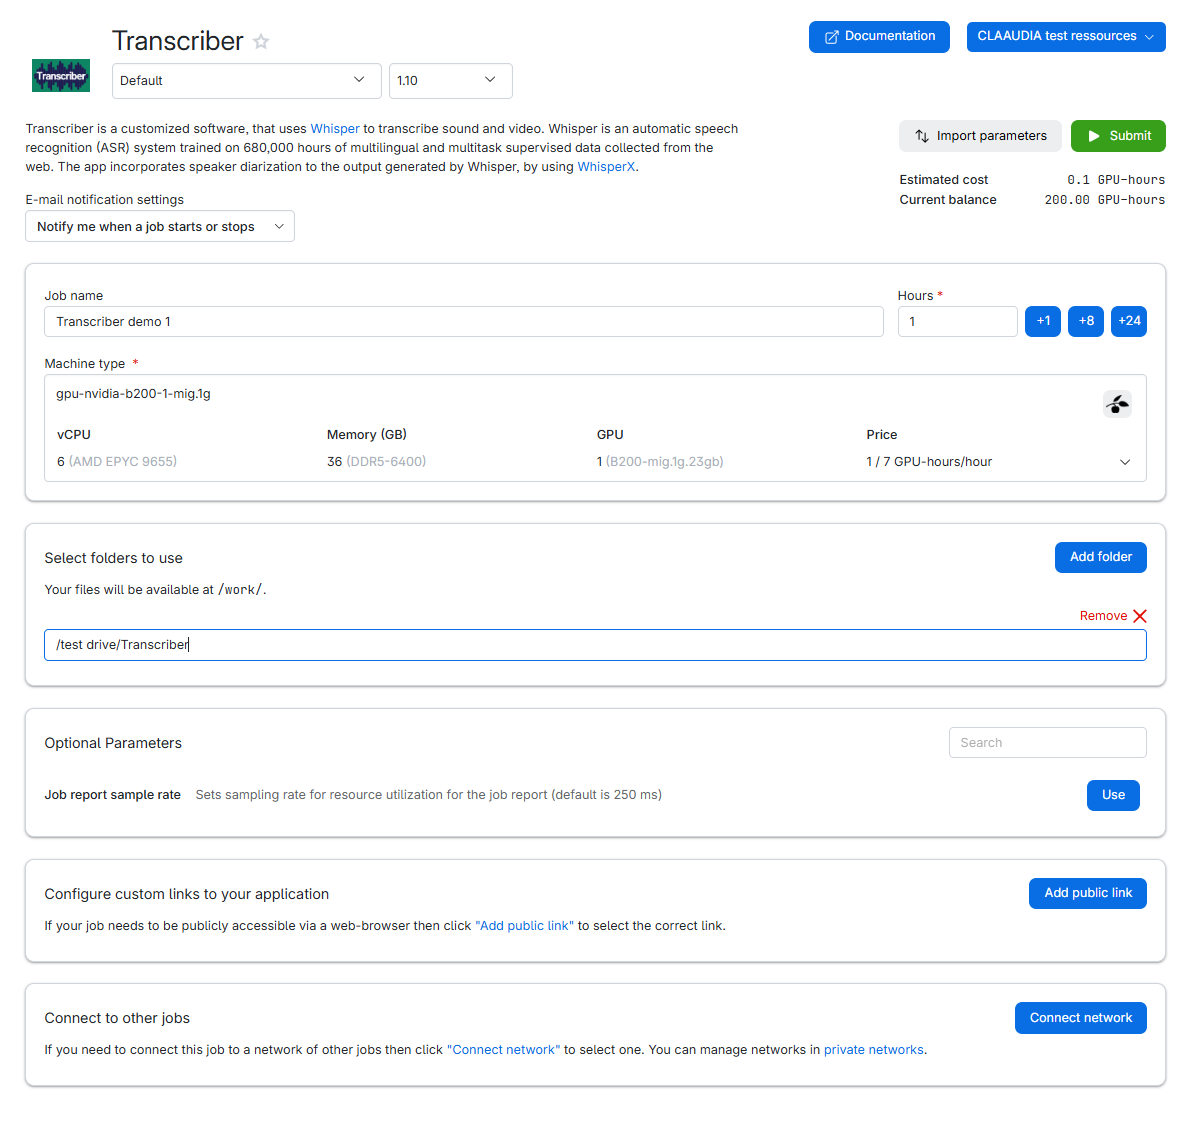
- Name your job: Choose a name that helps you identify the job later (e.g., "Transcriber Demo 1").
-
Note: Avoid special characters like "æøå".
-
Set the duration: Specify how many hours the job should run. For reference, a 1-hour audio typically takes about 1 hour to transcribe on a
cpu-amd-zen5-16machine.- You can stop the machine early or add more time later if needed.
-
Choose a machine: We recommend the MIG fraction GPU gpu-nvidia-b200-1-mig.1g if available, otherwise use cpu-amd-zen5-16.
-
(Optional) Select folders to use: If you want to use UCloud folders, select the folder(s) containing your files.
-
The app will scan these folders for compatible files. > Note: Folders named
UPLOADSandCOMPLETEDare reserved by the app and won't be scanned. -
Once you finish configuring, click Submit to start the Transcriber job.
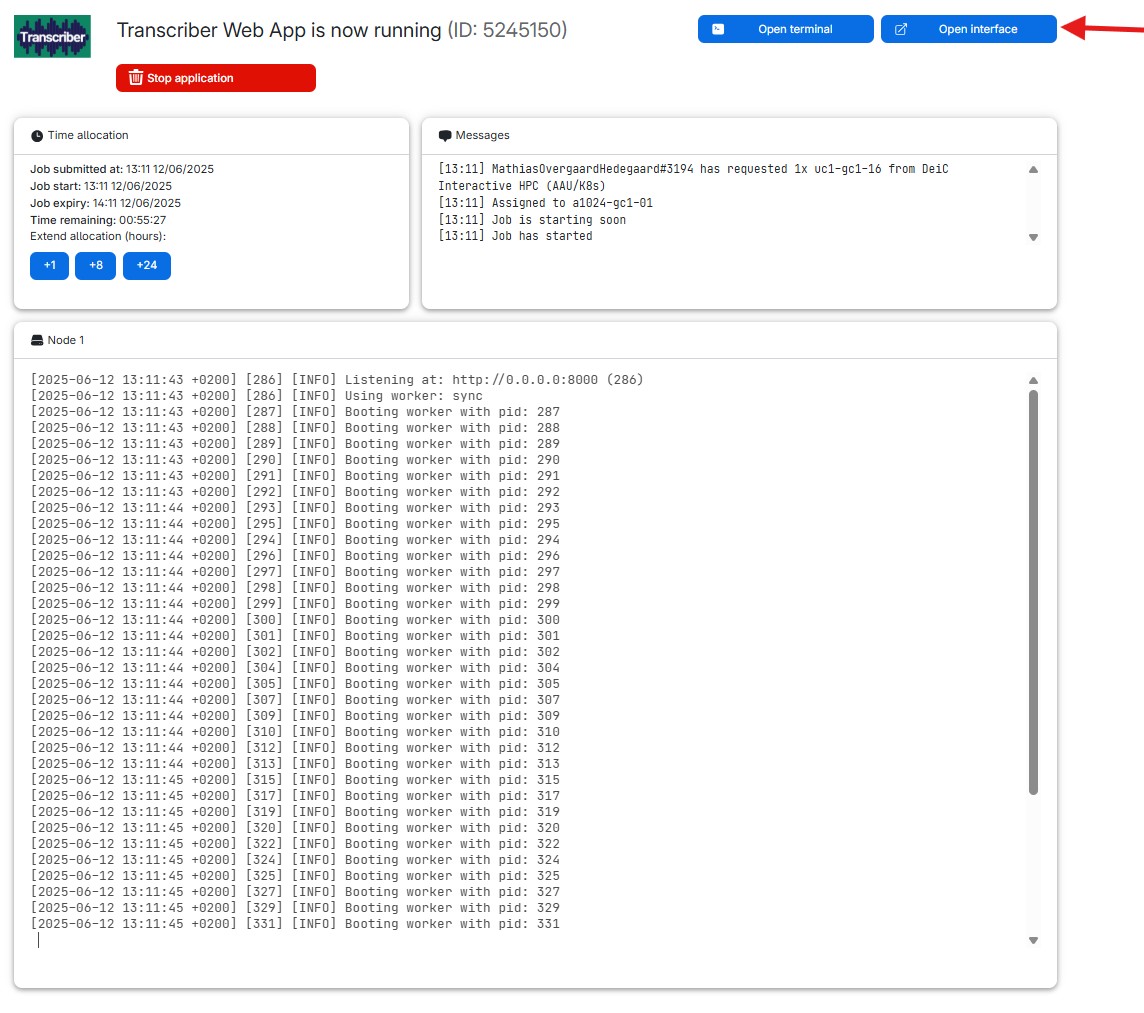
After submitting your job, you'll be redirected to a new page where your Transcriber machine is being prepared. Once it's ready, click the Open interface button to launch the Transcriber application.
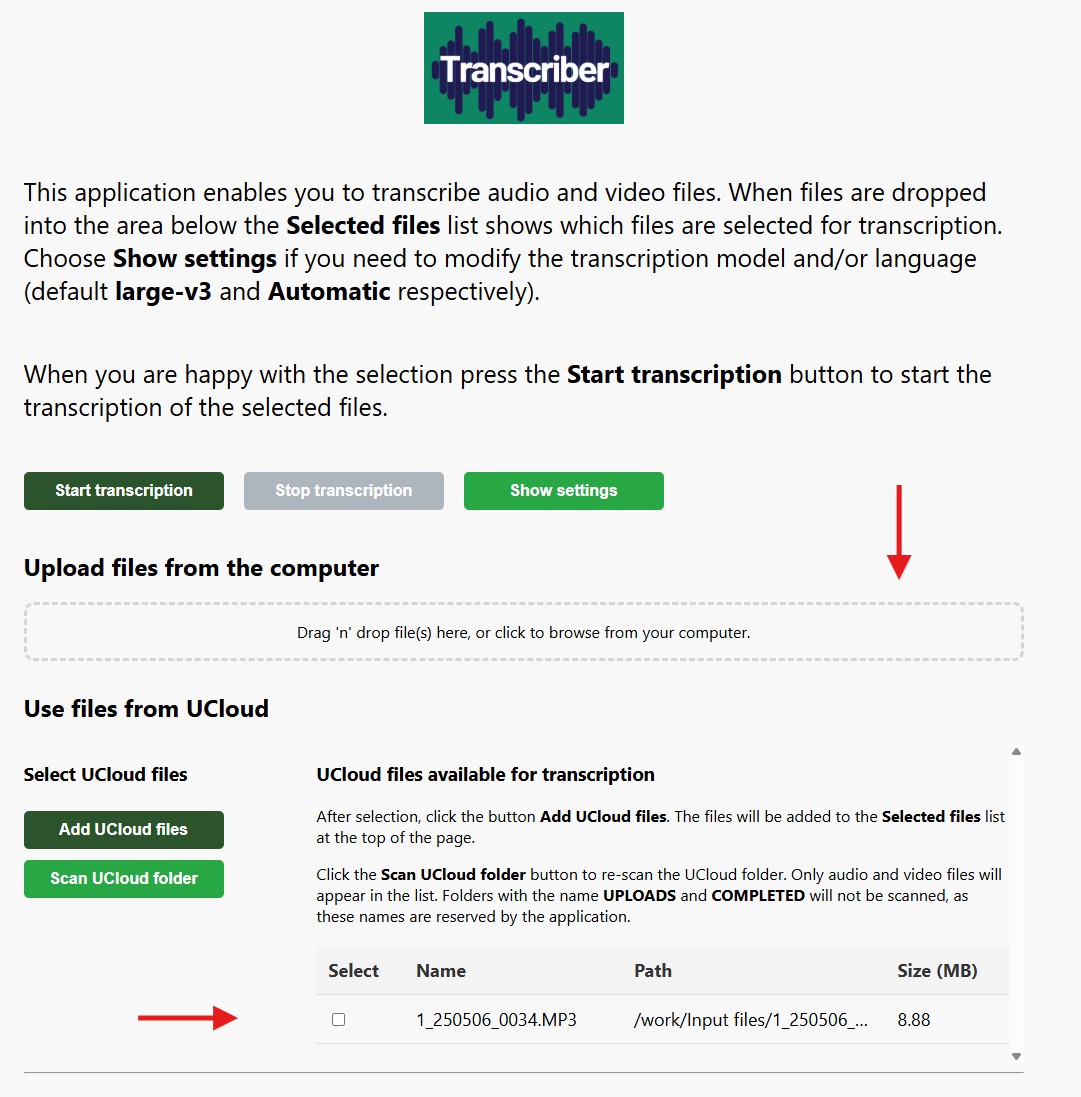
1.3 Adding files to be transcribed
Once the app starts, decide how you want to add files for transcription. You have two main options:
-
Use files from UCloud folders
- If you selected folders in the launch step, the app will automatically list the files detected there.
- Choose the files you want and click Add UCloud files to add them to your transcription queue.
- If you add new files to the folder after the job has started, click Scan UCloud folder to refresh the list.
Note: This section is only visible if you selected a folder when launching your Transcriber job on UCloud.
-
Upload files from your computer
- Drag and Drop your files directly into the upload area of the Transcriber app.
- Or click the upload area to browse your computer and select files.
- Multiple files can be added at once.
Info: The app can only process
.mp3,.mp4,.m4a,.wav, and.mpgfiles. If your file is in another format, we recommend using VLC to convert it. VLC can be downloaded from the Software Center/Company Portal.
1.4 Optional: Choose a transcriptionmodel
Select the model size:
- Small: Faster but less accurate.
- Medium: Slightly slower, more accurate.
- Large: Most accurate but slowest.
Note: The default is Large. With a machine featuring 16 vCPUs and 96GB of memory, transcription speed is about the same as the audio length (e.g., 1 minute of audio takes approximately 1 minute to transcribe).
1.5 Starting the transcription
- Once you have added all your desired files to the transcription queue, click Start Transcription.
- The app will begin transcribing your files and show a progress bar so you can track the transcription status in real time. > Note: The progress bar provides an estimated completion time for each file, but this estimate may change as the transcription proceeds. Factors such as the selected machine, the amount of speech in the audio, and the selected transcription model can affect how long each file takes.
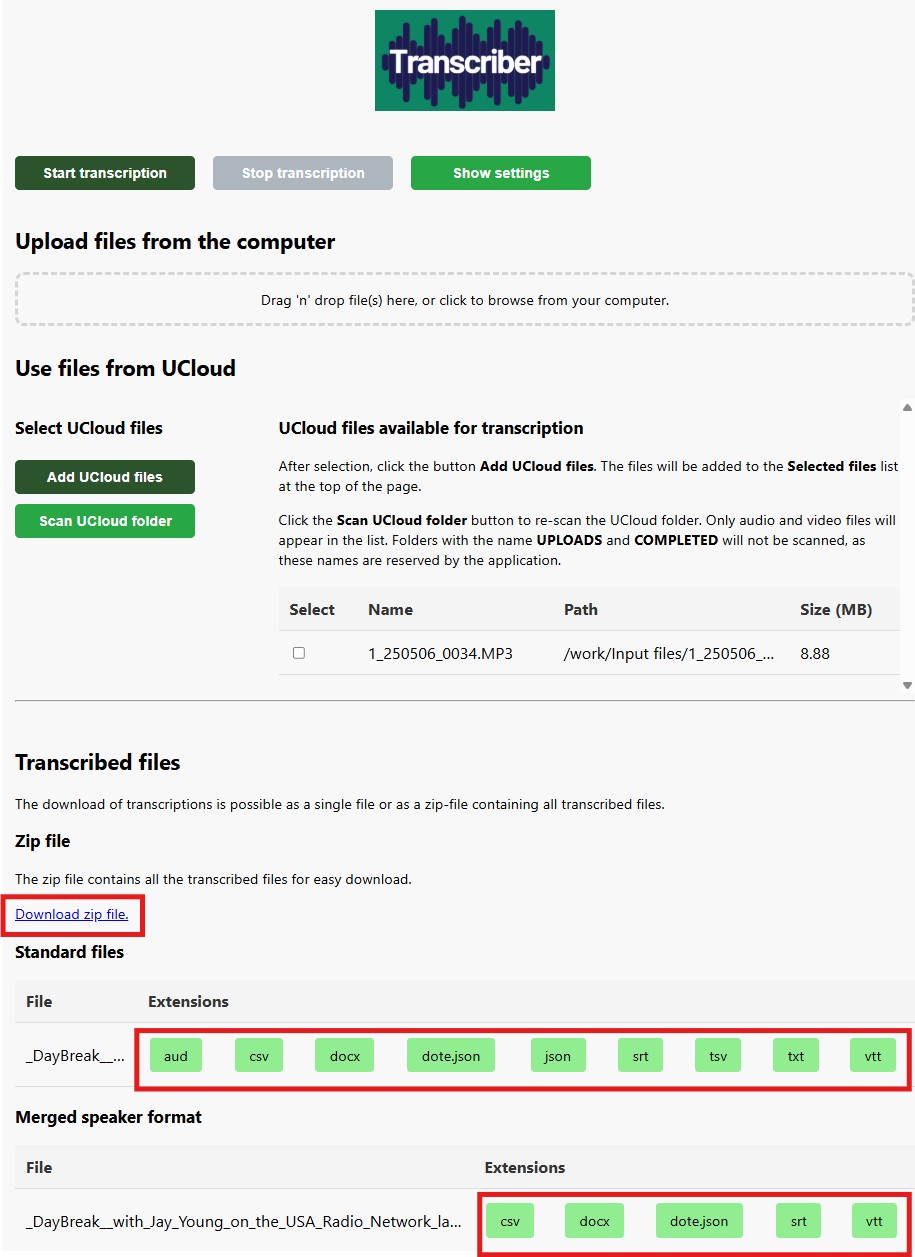
1.6 Downloading your transcriptions
- While the job is running: You can download completed transcriptions directly from the app, either one by one or as a zip file. When downloading individual files, you can select your preferred output format (TXT, DOCX, VTT, etc.). If you choose to download as a zip file, you'll receive all available output formats for each transcription.
- Important: If you are working with confidential or sensitive data, remember that you may not download it directly to any personal or nonapproved devices.
Note: For better readability and to save time on post-processing, you can download a merged speaker format of the transcription that combines consecutive text entries from the same speaker into natural, flowing sentences. This feature helps streamline your workflow by reducing the need for manual text editing.
- After the job is finished: All transcriptions will be available on UCloud in the folder:
/Jobs/Transcriber/<job-id>/TRANSCRIPTIONS/.
1.7 Optional: Adjusting settings
-
Click Show settings at the top of the page to adjust:
-
New feature: Transcribe and stop This setting allows the job to stop automatically once all selected files have been transcribed. Enabling this option is highly efficient in terms of compute hours allocated to your project, as the job remains active only while work is being performed. As always, the transcribed files can be found in the UCloud filesystem, either in the job folder or in the folder selected at startup.
-
The transcription model (default is "large-v3").
- The language (default is "Automatic").
Note: If you're unsure, the default settings are usually best.
Need more advanced options?
Try the Transcriber batch version, which offers extended configuration possibilities.
This guide provides step-by-step instructions for using the Transcriber Batch application, which offers advanced configuration options and is optimized for efficient, large-scale transcription tasks.
1. Using the Transcriber batch application
1.1 Finding the application
- Go into the application and use the search function to find Transcriber.
- Click on Transcriber.
1.2 Using the application
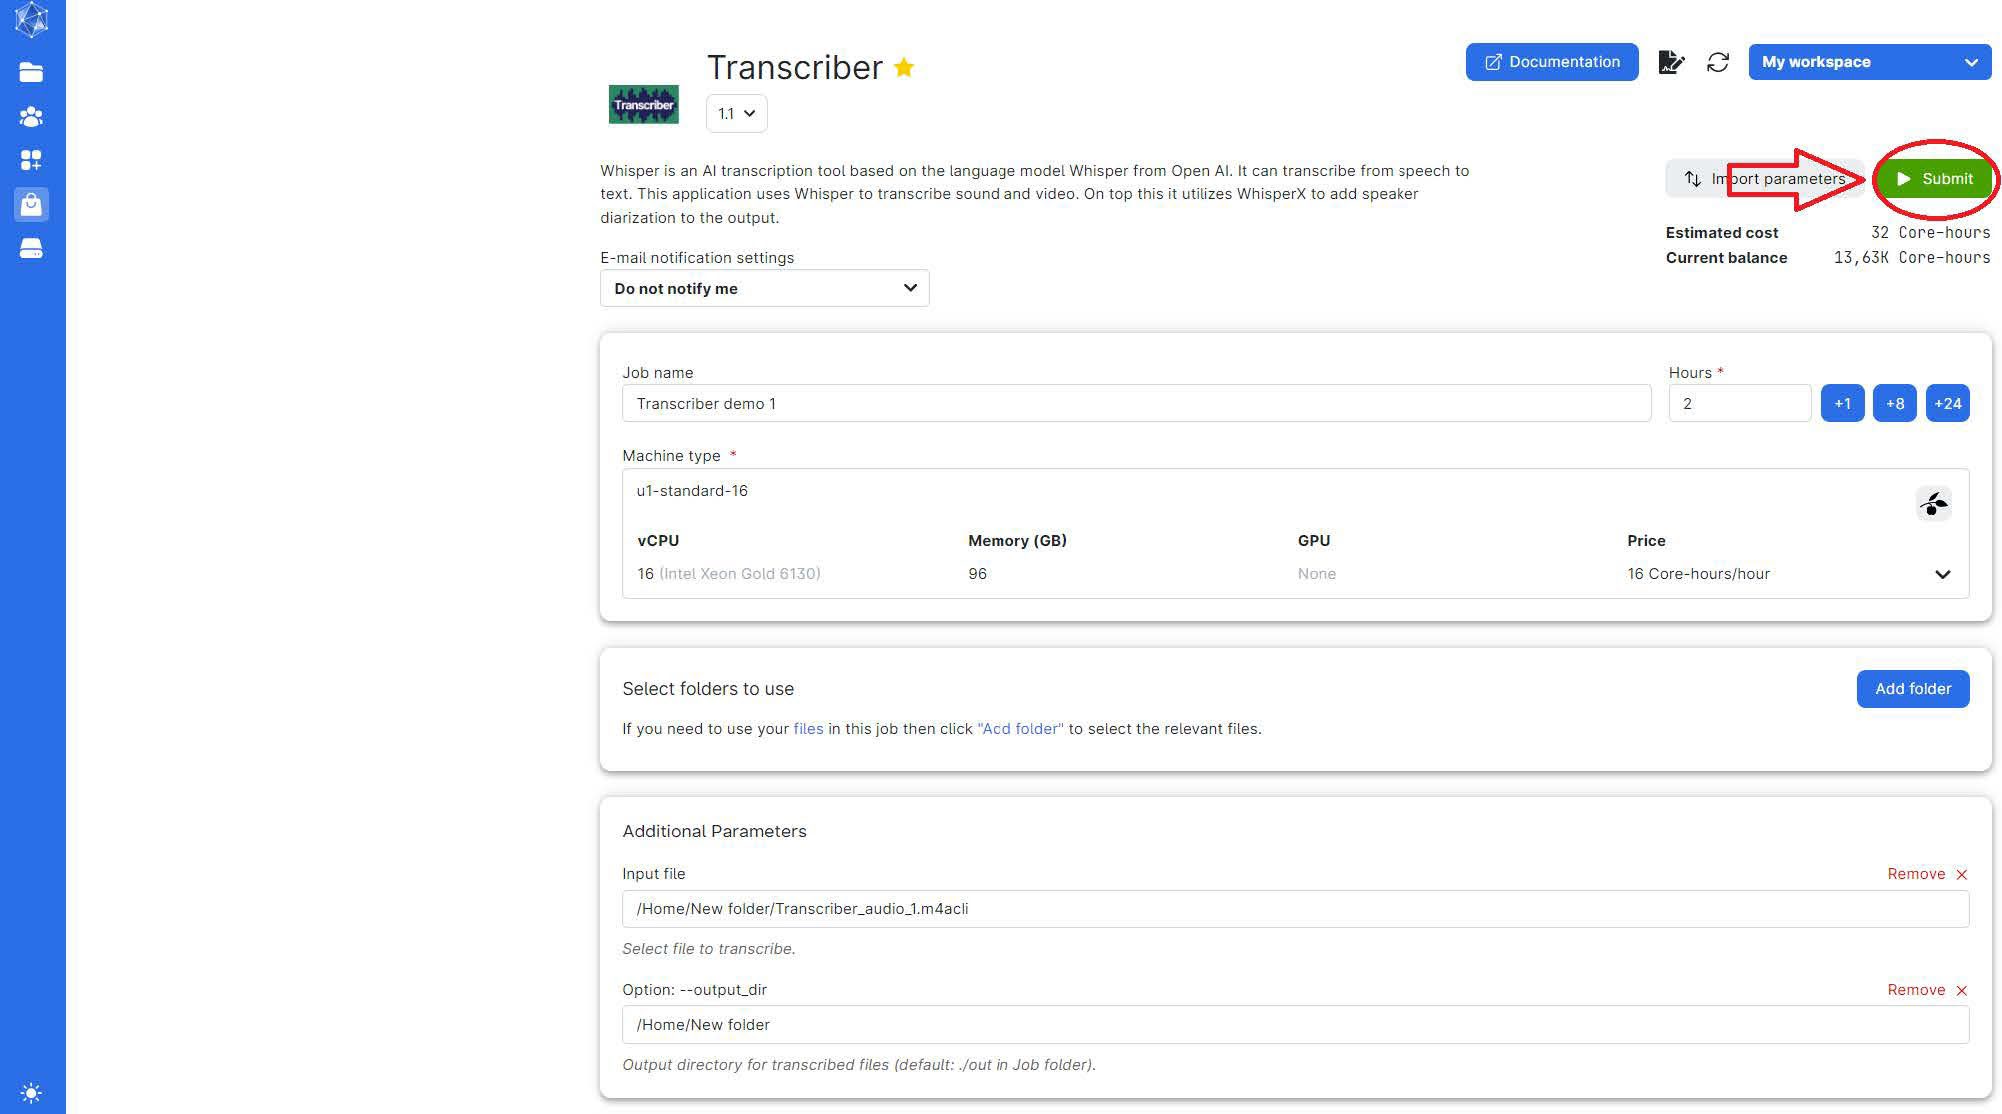
You should now see the following screen:
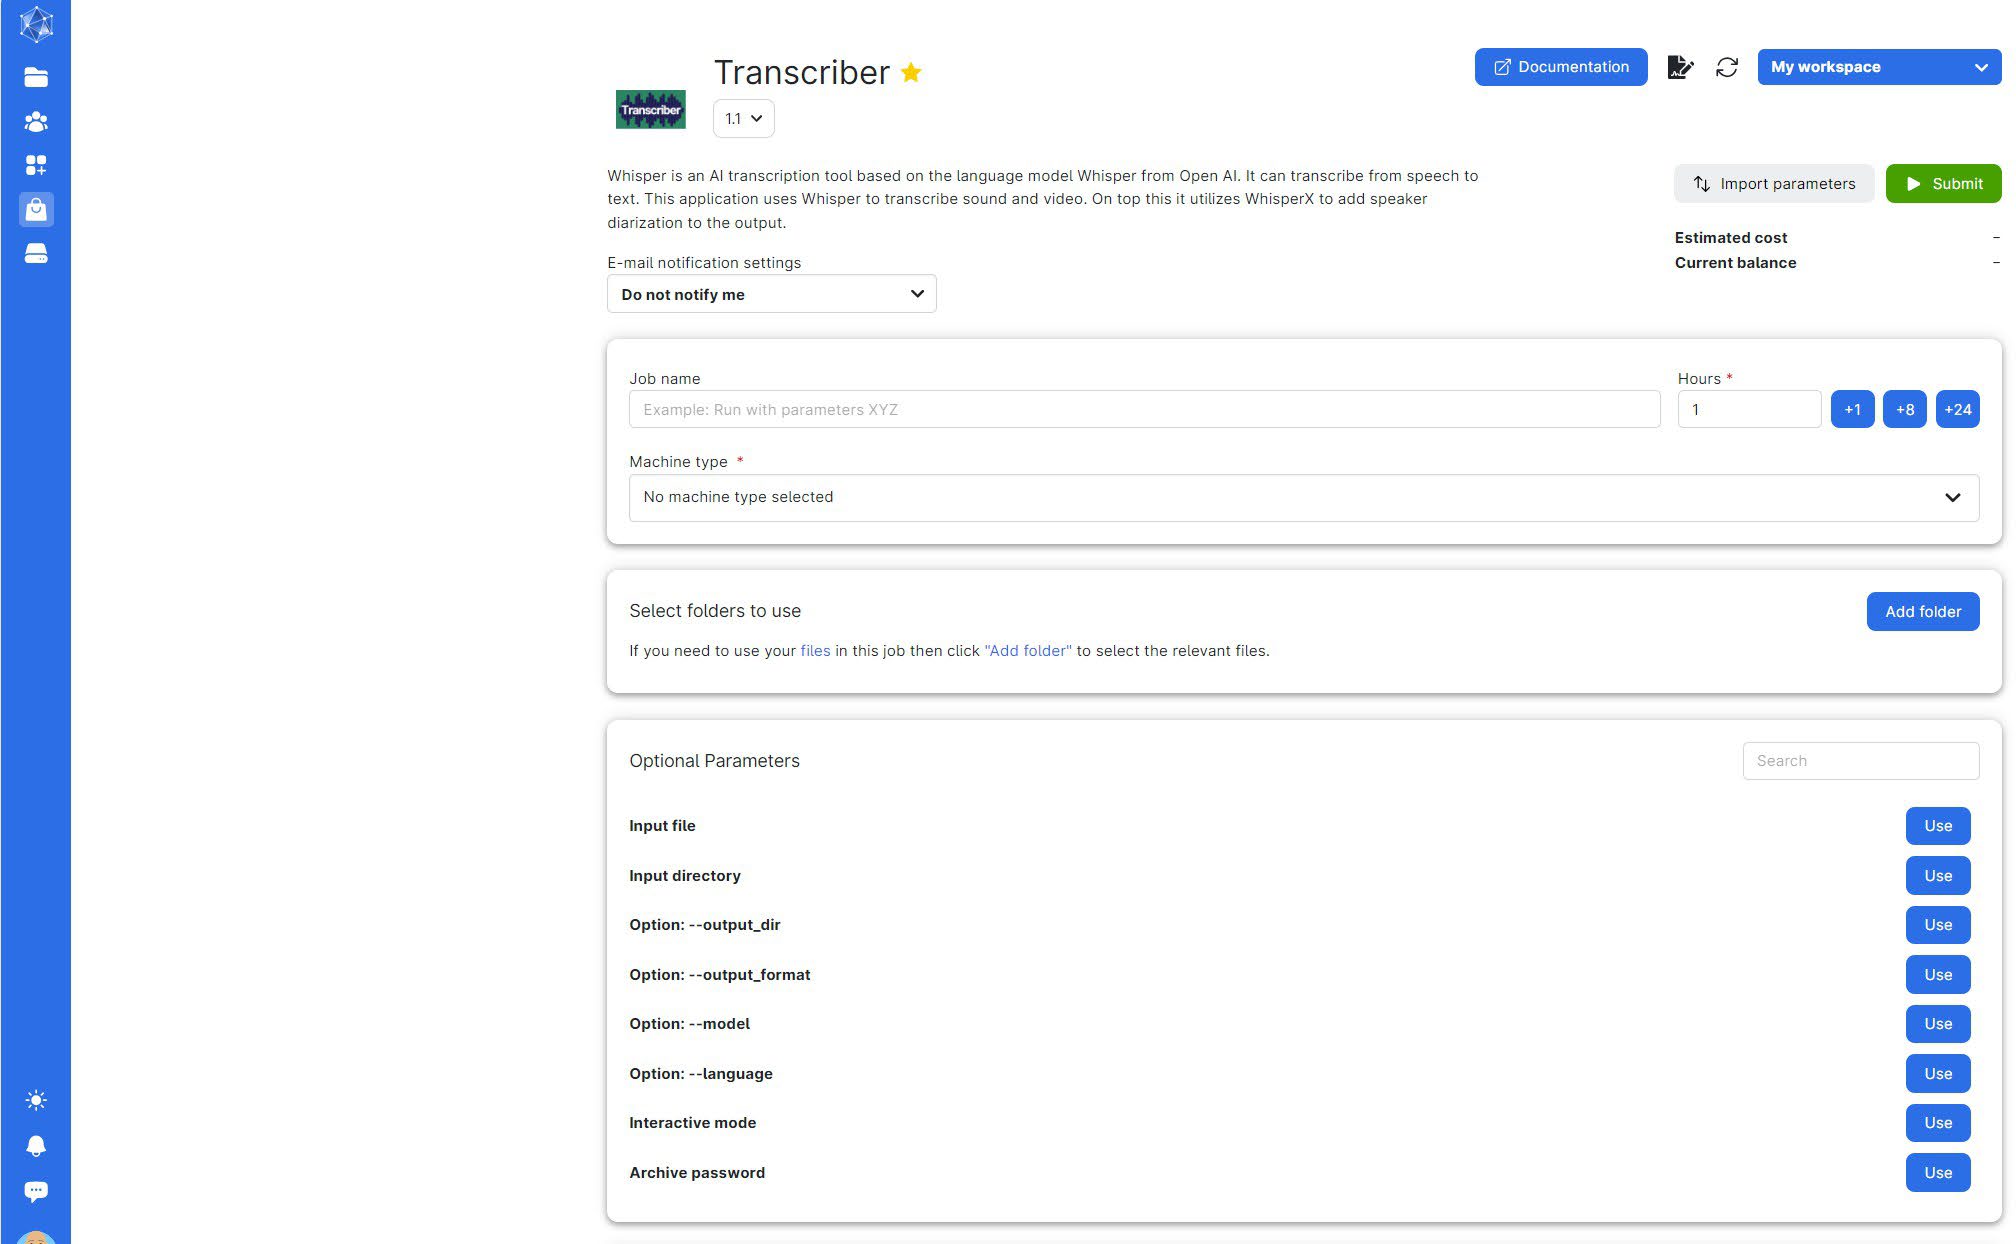
There are several options here, and it can seem overwhelming. For this example, we'll walk through the quickest way to start a transcription.
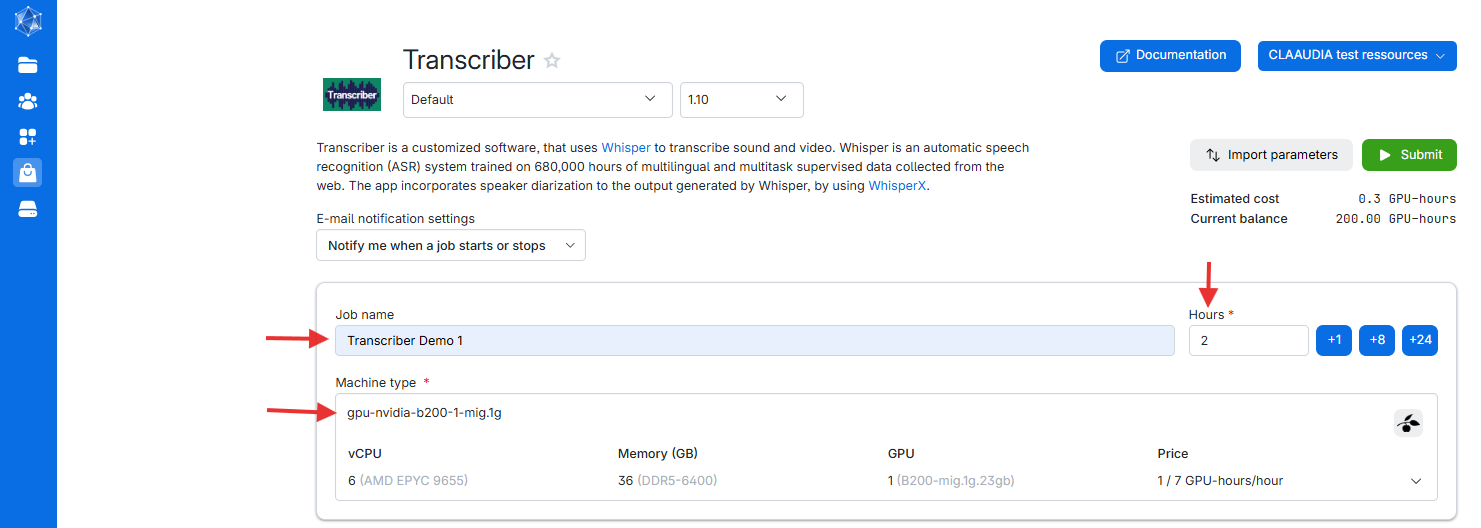
1.2.1 Choose a name for your job
- Pick a name that makes it easy to find your data later and distinguish between different jobs.
- Example: "Transcriber demo 1".
Note: Job and file names cannot include special characters such as "æøå".
1.2.2 Select the duration of your job
- The application can transcribe in 1:1 time. For instance, a 1-hour audio file will take approximately 1 hour to transcribe.
- We recommend allocating double the length of the audio file to avoid interruptions.
- Example: For a 1-hour audio file, allocate 2 hours.
Note: If you run out of allocated time, the file being transcribed will fail. You can allocate more time after starting the job if needed.
1.2.3 Pick a machine to use
- We recommend the gpu-nvidia-b200-1-mig.1g machine, which performed best in our tests. If the option is unavailable we recommend the cpu-amd-zen5-16 as an alternative.
Feel free to test with sample files to see what works best for you.
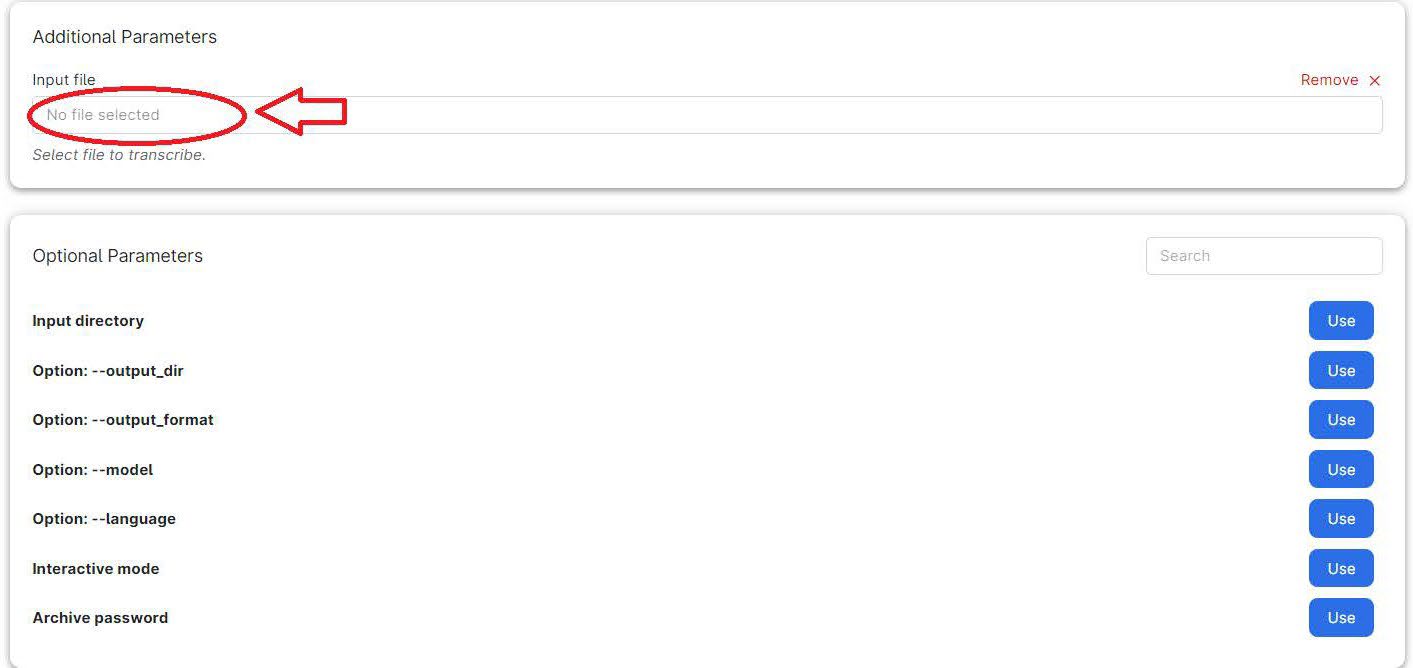
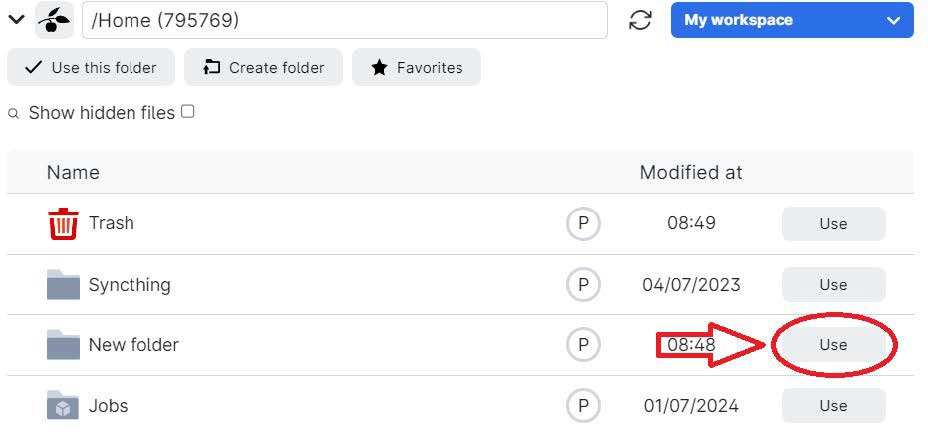
1.2.4 Select the input file
- Click the "use" button.
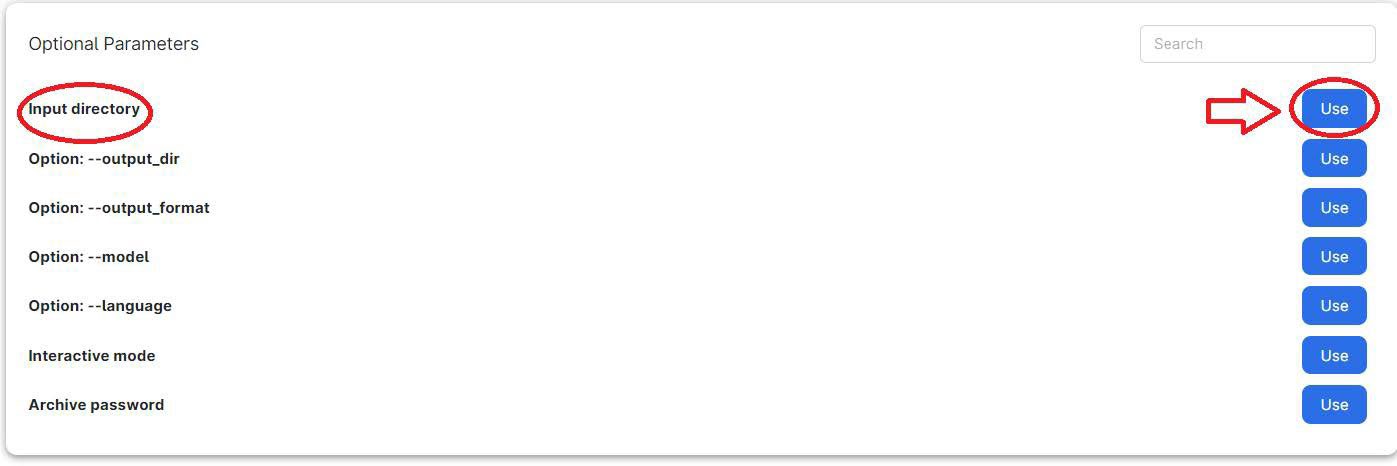
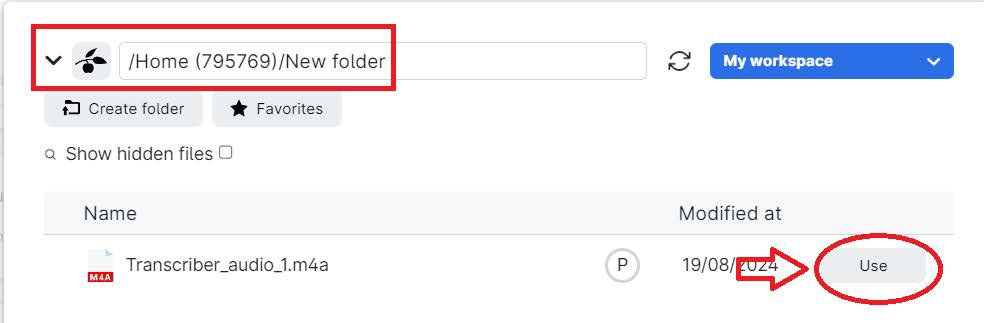
- Click the text box to select your file.
- Navigate to your "drives" and select the folder with your file or click "use" if it's already listed.
Note: The app can only process
.mp3,.mp4,.m4a,.wav, and.mpgfiles. If your file is in another format, we recommend using VLC to convert it. VLC can be downloaded from the Software Center/Company Portal.
1.2.5 Select the output directory
- Choose where your output will be saved.
- Click "use" on "option: --output_dir".
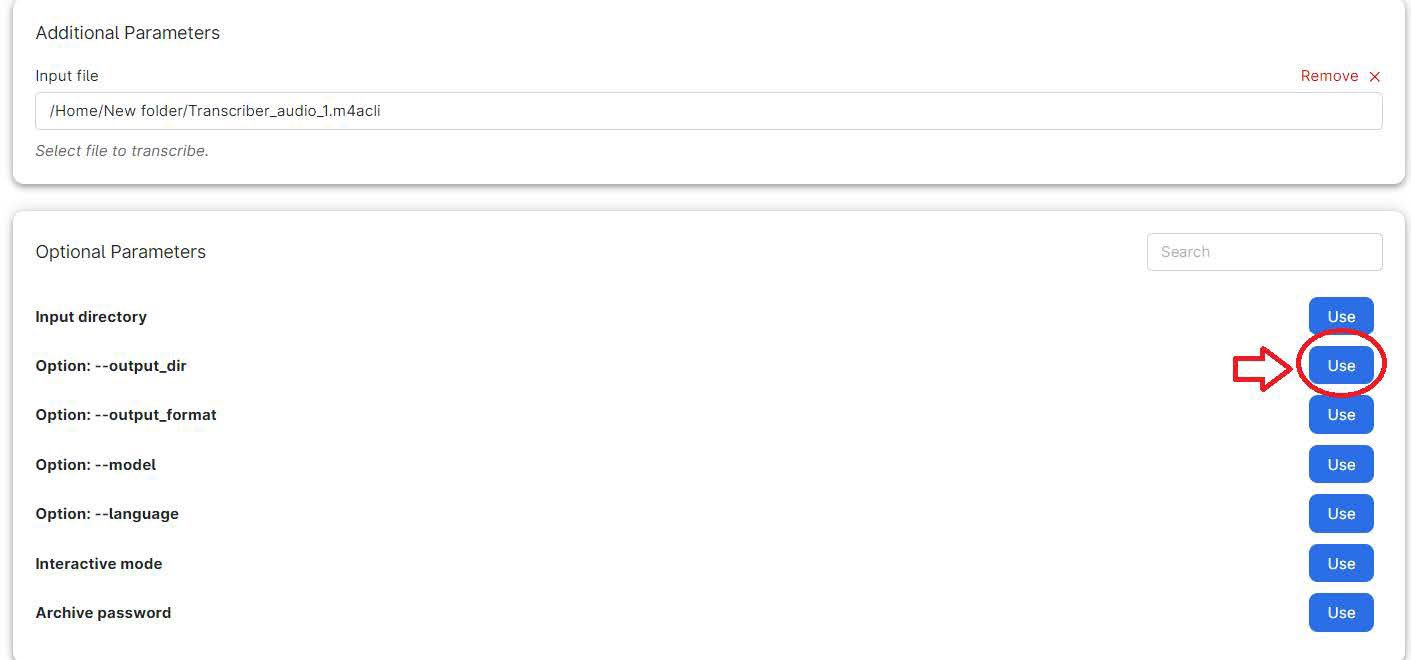
- Select the folder you want for your transcription output.
Note: The app supports
.mp3,.mp4,.m4a,.wav, and.mpgfiles. For other formats, consider converting using VLC.
Now, you are ready to begin your transcription. Click Submit to start the process.
There are additional options available. These are covered in the "Other Options" section.
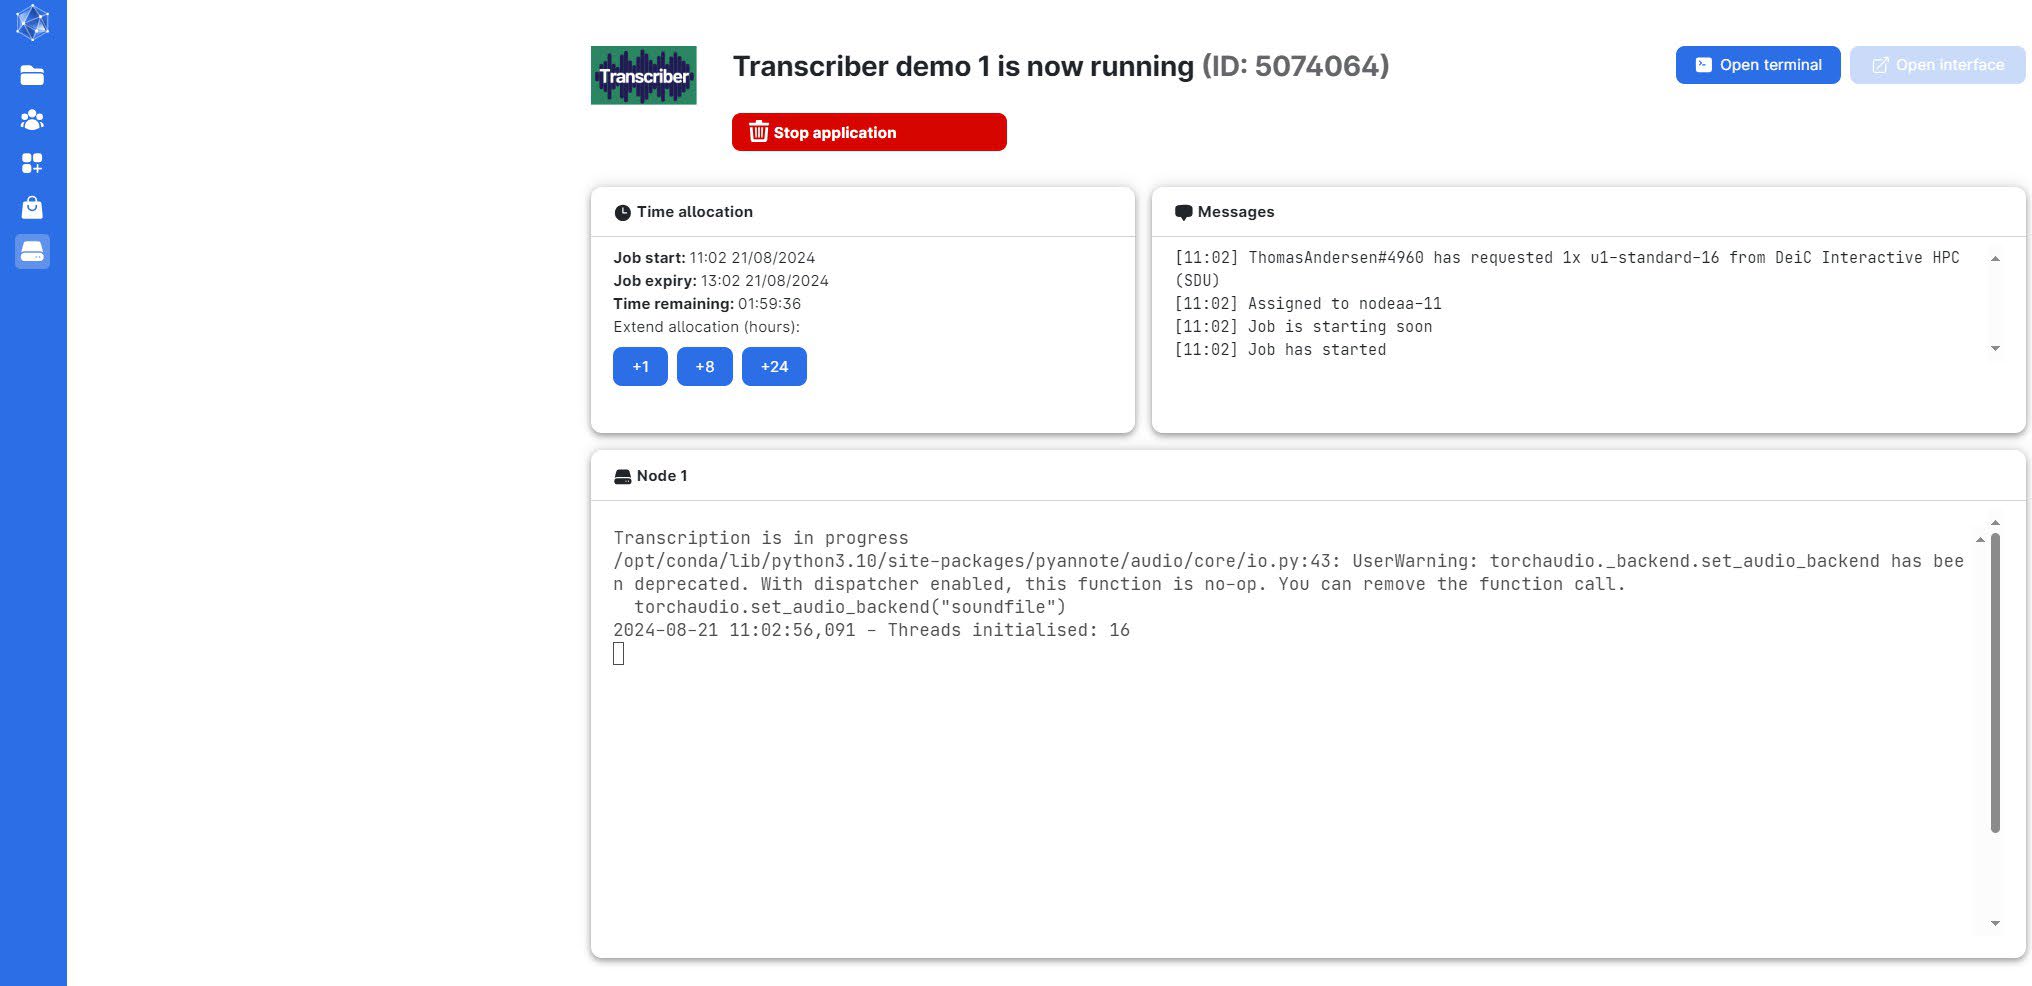
Once the process starts, you can close your computer. If you want to ensure everything is running smoothly, wait until a "node" is assigned. Your screen will look like this:
Once the transcription is complete, you will see the following screen:
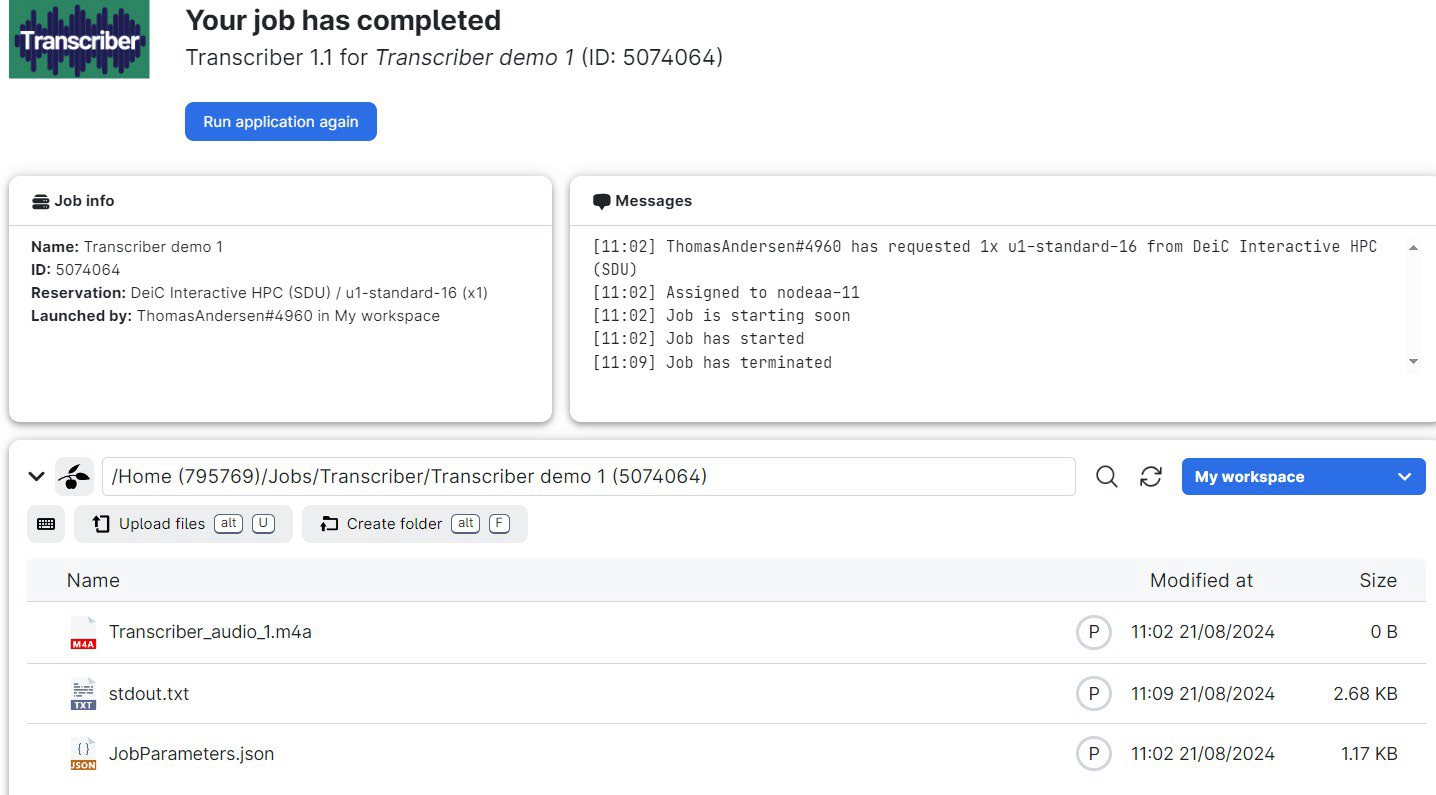
Note: This is not the actual output of your transcription. The transcription files are located in the folder you selected for output. You’ll find something like this:
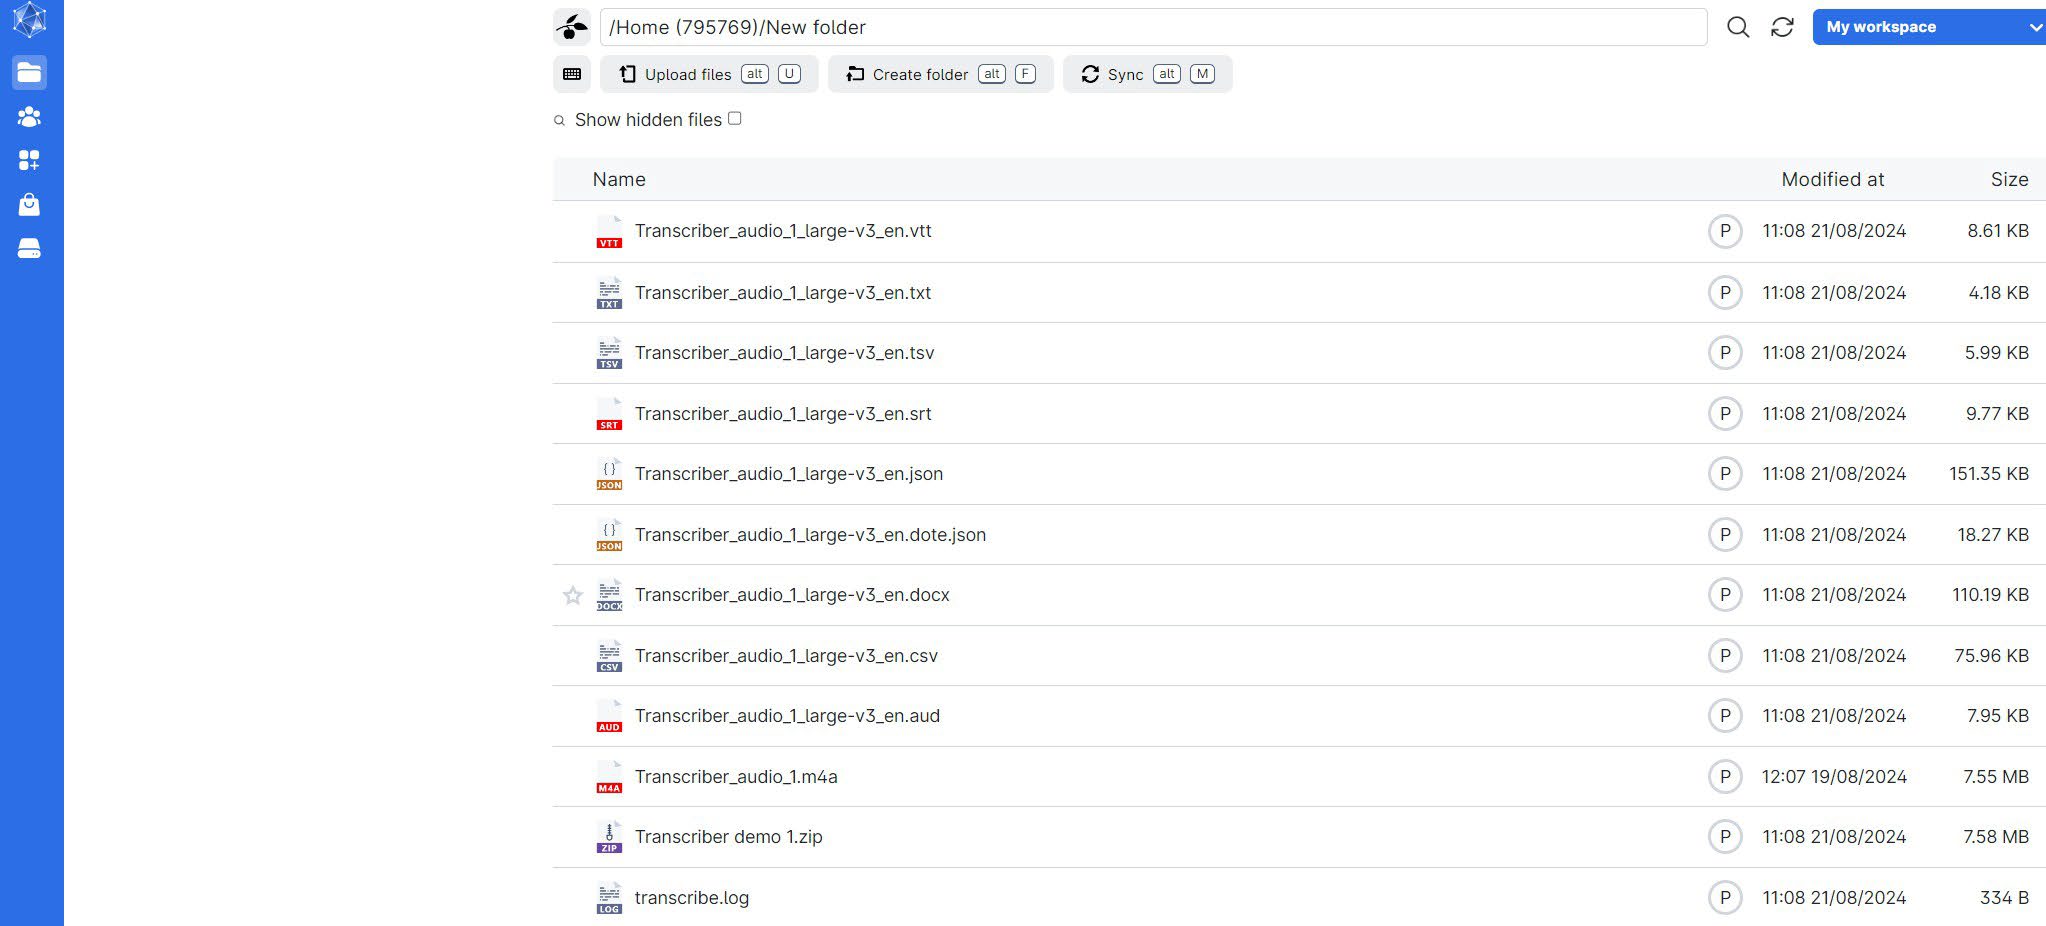
1.3 Transcription output formats
You will have several different files with your transcription. Commonly used formats include .txt and .docx. You can choose the format that suits your needs best. If you want a specific output format, refer to the "output_format" section under "Other Options".
Note: It is not possible to preview
.docxfiles directly within UCloud. To view the transcription in.docxformat, you must first download the file to your own computer and open it with Microsoft Word or another compatible program.
2. Optional parameters
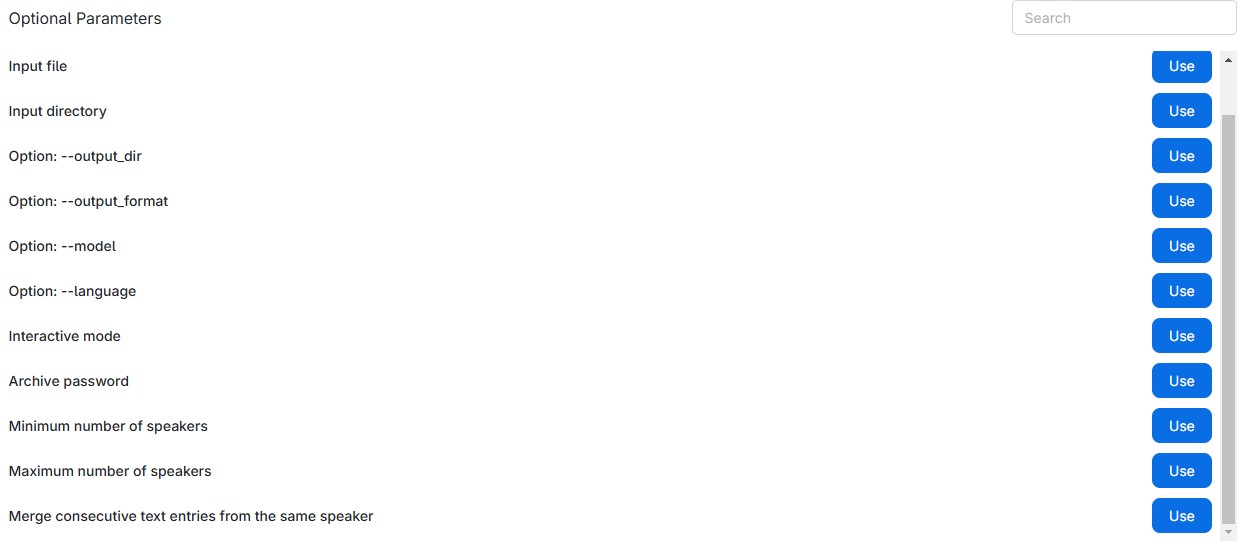
2.1 Option: --output_format
By default, the application produces all 8 formats. You can limit the output to a specific format by selecting one of the following:
- CSV: Contains all parameters outputted from the Whisper model.
- SRT: SubRip file format, a widely adopted subtitle format.
- TXT: Pure text file with the transcription.
- VTT: Web Video Text Tracks format, includes timestamps.
- JSON: JavaScript Object Notation.
- TSV: Tab-separated values file containing start, end, and text.
- DOTE: Transcription software developed by the BigSoftVideo team at AAU.
- DOCX: Text file with transcription and speaker recognition.
2.2 Option: --output_model
Select the model size:
- Small: Faster but less accurate.
- Medium: Slightly slower, more accurate.
- Large: Most accurate but slowest.
The default is Large. With a machine featuring 16 vCPUs and 96GB of memory, transcription speed is about the same as the audio length (e.g., 1 minute of audio takes approximately 1 minute to transcribe).
2.3 Option: --output_language
Specify the language for transcription. The Whisper model can detect and automatically choose the language. If you select a language manually, the model will translate audio into that language.
Note: The detected or chosen language determines the output language. For example, if the chosen language is English, the model will translate multiple languages into English.
2.4 Interactive mode
Enable interactive mode for access to the app terminal or a web interface. The web interface includes a JupyterLab workspace for working with notebooks.
2.5 Archive password
Encrypt and password-protect the ZIP output archive. Specify a password for the archive as a text string.
2.6 Minimum and maximum number of speakers
Specify the number of speakers to improve speaker diarization accuracy in some cases.
2.7 Merge consecutive text entries from the same speaker (Recommended)
This option combines consecutive text entries from the same speaker into a single block, improving readability.
- When enabled, the app generates additional files with merged text in docx, dote, json, and csv formats. These files are named
filename_mergedand are created alongside the original files.
To make the option visible, scroll down in the optional parameter window.
Need assitance?
Reachout to CLAAUDIA at https://serviceportal.aau.dk.
Who made it?
Research & development by
- CLAAUDIA, ITS, AAU
With support from
- DeiC (The Danish e-Infrastructure consortium)
- Aalborg University
- University of Southern Denmark
- Aarhus University
- Center for Humanities Computing
Citation
CLAAUDIA, ITS, AAU (2024). Transcriber (Version1.0) [App]. UCloud interactive HPC system, eScience Center at the University of Southern Denmark. https://cloud.sdu.dk/app/jobs/create?app=transcriber&version=1.7