Guide: Transferring volumes using the Strato interface
This guide explains how to transfer a volume to another user using the Strato web interface. You can also use this method to change the ownership of a volume within a project by transferring it to another person or yourself within the same project.
1. Log in to Strato
- Open your web browser and navigate to your Strato interface.
- Log in with your WAYF credentials.
2. Select the right project
- Select the project where the volume is owned in the top ribbon.
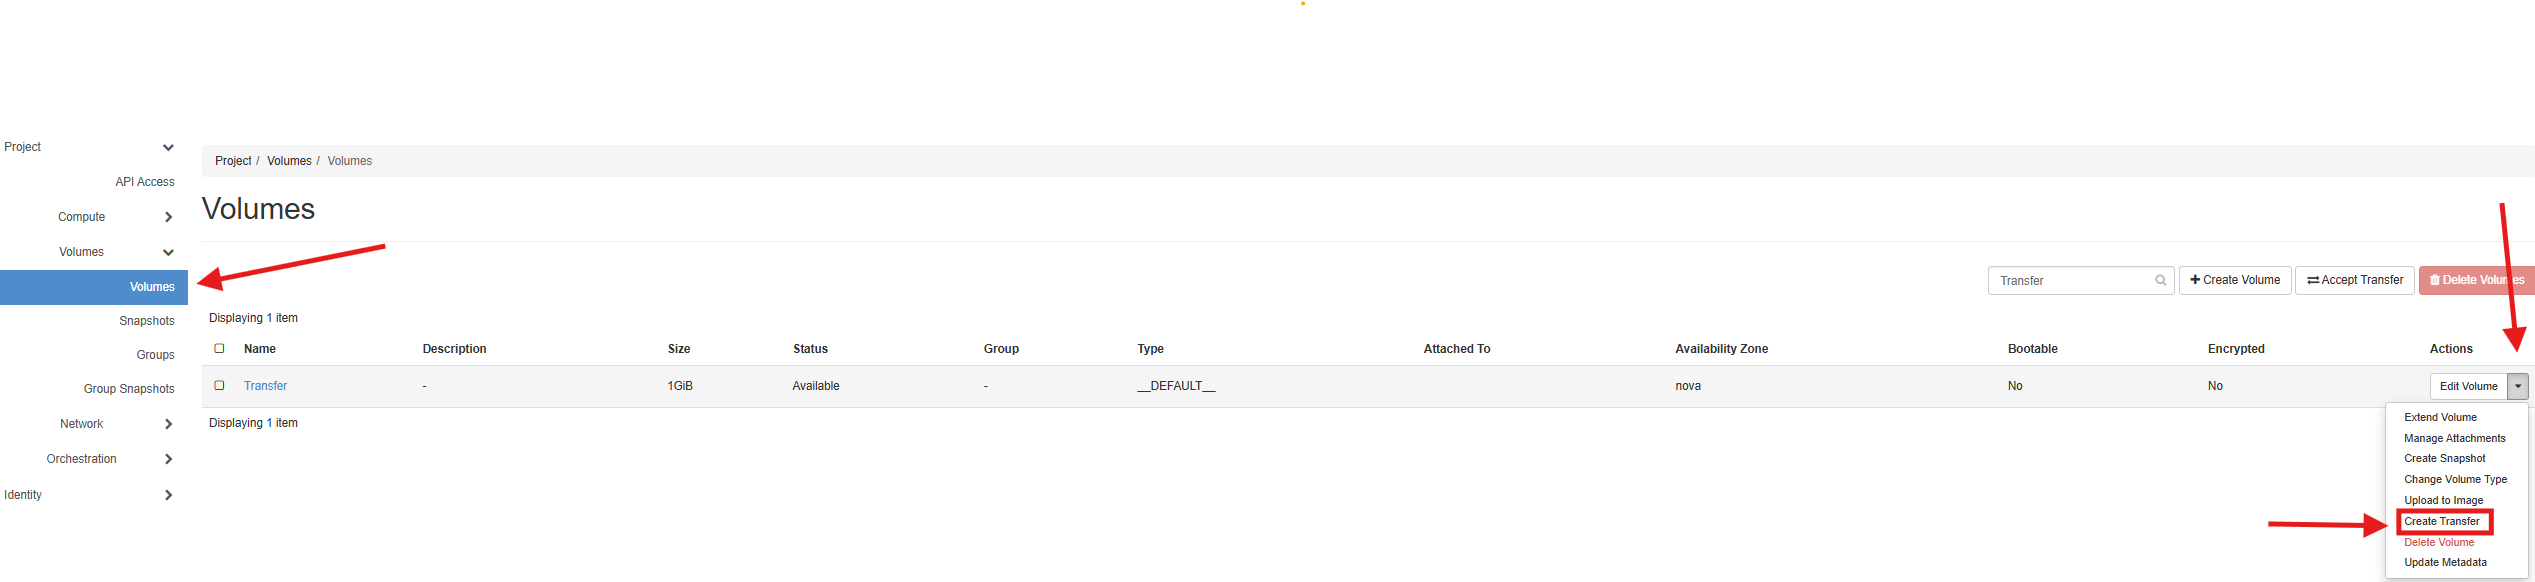
3. Navigate to volumes
- In the left sidebar, navigate to Volumes > Volumes and you will now see a list of all the volumes in the project.
4. Select the volume
- Locate the volume you want to transfer.
- Ensure the volume is available (not attached to any instance).
Note: It is a good idea to name your volumes appropriately before deleting any compute instances that they are attached to. Click the Edit Volume button to edit the volume name.
- Click the Create Transfer button in the Actions column for that volume.
5. Create the transfer
- Enter a Name for the transfer (optional).
- Click Create Volume Transfer.
A Transfer ID and Authorization Key will be displayed. Copy these details and share them securely with the recipient.
6. Accept the transfer (Recipient)
- The recipient logs in to the Strato interface.
- Go to Volumes > Volumes.
- Click Accept Transfer.
- Enter the Transfer ID and Authorization Key provided.
- Click Accept Volume Transfer.
The volume will now appear in the recipient's project.
Notes
- The volume must be detached from the server before transfer.
- After transfer, all access to the volume is moved to the recipient.